PLANNING
Last year was my first ever peek into “The Workwoman’s Guide” by A Lady (1838) and let’s just say the book is one of the most fascinating sewing books ever. Every time I crack it open, I find something new. In it, the Lady gives directions for sewing just about any garment one might need to clothe one’s family, as well as instructions for bedding, household linens, straw plaiting, knitting, and many household tips. For many of the garments, the author provides a hand drawn diagram and/or general measurements so that home-sewers can create their own versions. Measurements are often provided in “nails”, an old-timey measurement equivalent to 2 1/4 inches. After months of mathing and sneaky multiplication magic, I finally broke down and made myself a nail-tape, or a cloth measuring tape marked with nails instead of inches and it has proven to be quite useful. To hopefully avoid confusion, any measurements I give in nails with have the inches in parenthesis next to it.
I’m not sure why I wanted to make a bathing gown, other than I was curious how it would turn out. I’ve not seen an extant bathing gown from the 1830’s (if you have, please let me know!), nor have I been able to find many fashion plates or illustrations about bathing during the 1830’s.
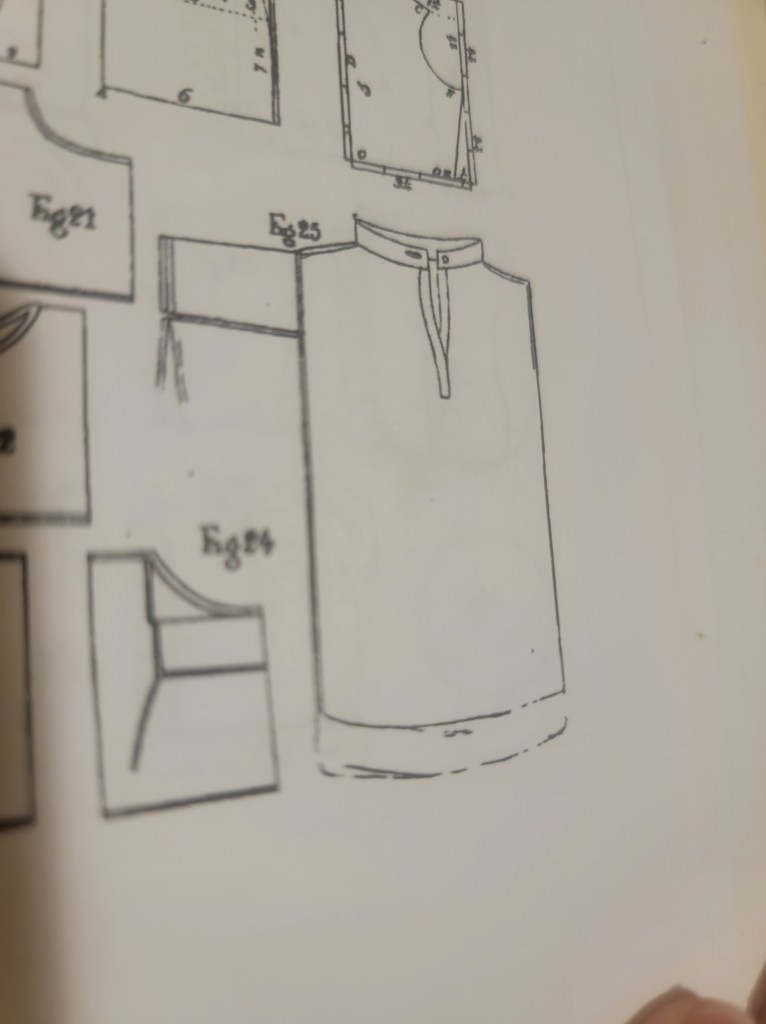
Three simple paragraphs of directions for the Bathing Gown are given on page 61 of the book, and a single illustration of the finished garment is provided on Plate 8, FIG. 25. I’m no expert here, but this is how I choose to break these directions down and interpret them.
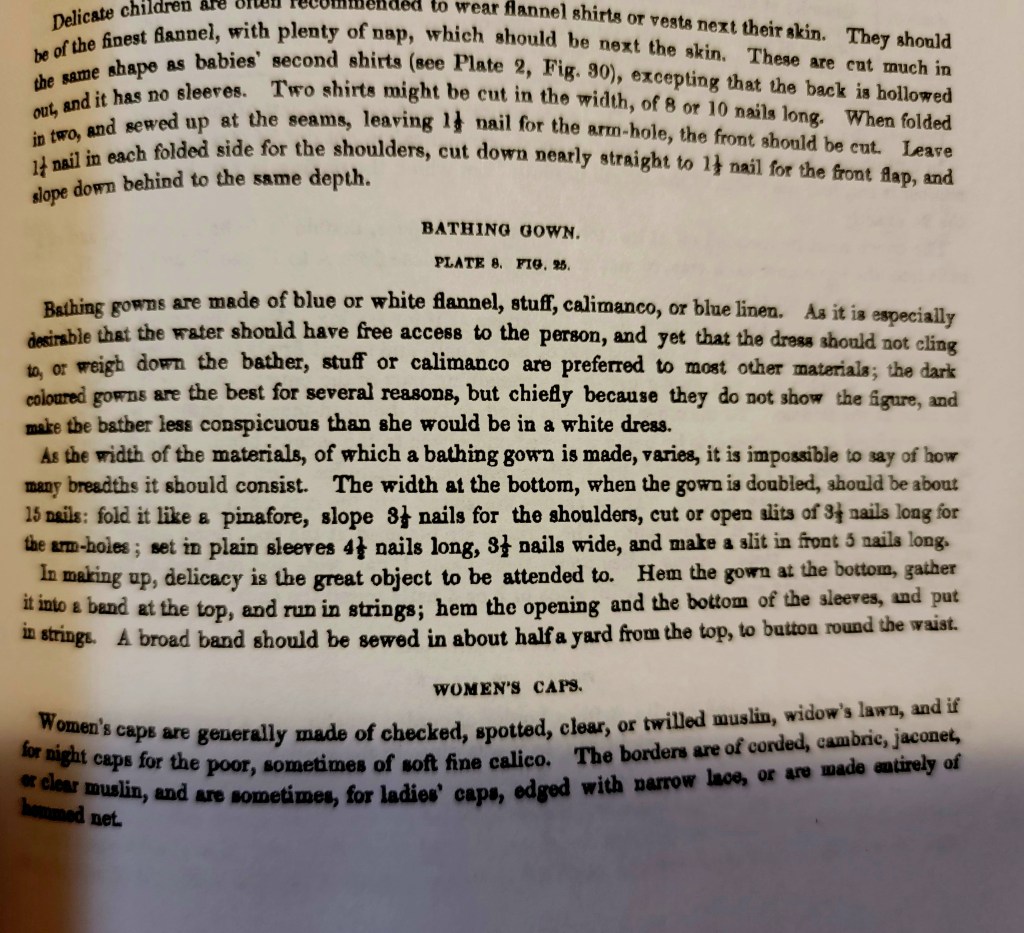
The first paragraph is as follows; “Bathing gowns are made of blue or white flannel, stuff, calimanco, or blue linen. As is it especially desirable that the water should free access to the person, and yet that the dress should not cling to, or weigh down the bather, stuff or calimanco are preferred to most other materials; the dark coloured gowns are the best for several reasons, but chiefly because they do not show the figure, and make the bather less conspicuous than she would be in a white dress.”
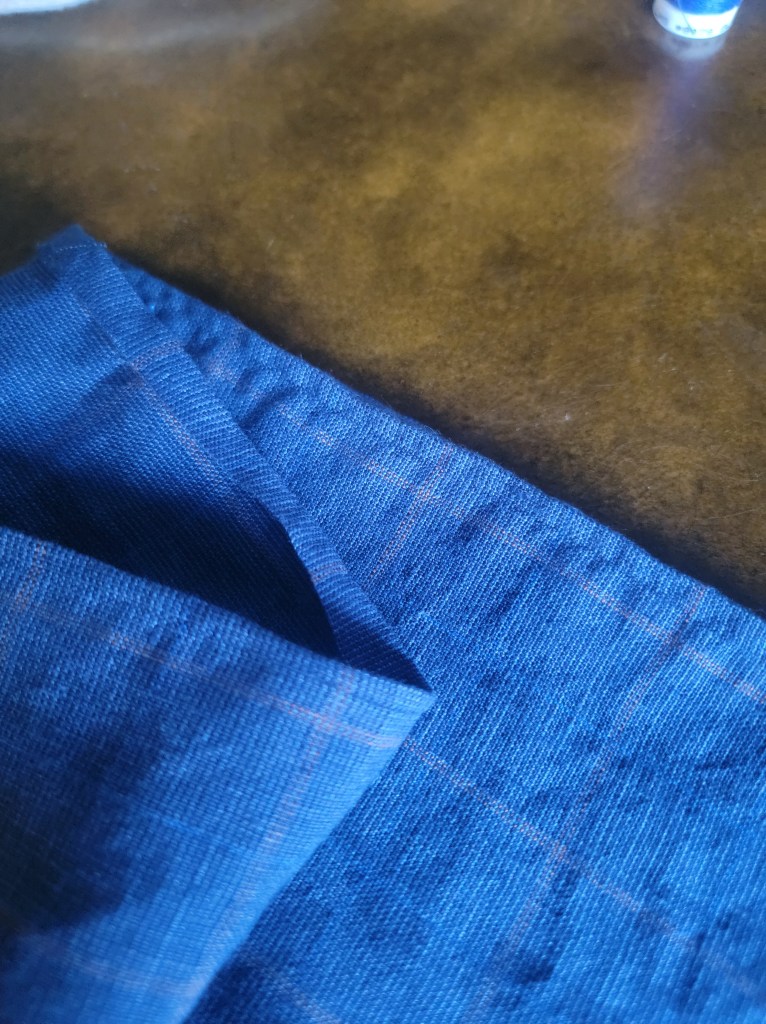
I chose a dark blue medium weight linen, so I can mark off the box for linen as well as a dark colour. The check in the fabric is not necessary, but I love how subtle it is, and it just makes squaring up linen so fun to work with, so the check verses a solid colour is a design choice on my part that may or may not be accurate for a bathing gown.

Second paragraph; “As the width of the materials, of which a bathing gown is made, varies, it is impossible to say of how many breadths it should consist. The width of the bottom, when the gown is doubled, should be about 15 nails (33 3/4 inches): fold it like a pinafore, slope 3 1/2 nails (7 7/8 inches) for the shoulders, cut or open slits of 3 1/2 nails long for the arm holes; set in plain sleeves 4 1/2 nails (10 1/8 inch) long, 3 1/2 nails wide, and make a slit in front 5 nails (11 1/4 inch) long.”
Ultimately, a pretty simple garment with no gores or gussets. I did wonder if this was an instance where it’s just such common sense that there should at least be underarm or neck gussets that the author didn’t bother to include mention of them. But there was also no suggestion of gores or gussets in the illustration either, so I opted to go on without them. I did have enough scrap after cutting to use as under-arm gussets if I ended up desperately needing that extra give but ended up not needing them. So, the pieces I planned for were a front and a back, and two rectangular sleeve pieces. The finished hem circumference should be about 67 1/2 inches, so I ordered two yards of fabric and figured whatever that worked out to be would close enough, since the width of the finished garment doesn’t seem to need to be exact. The sleeves are rectangular, cut 10 1/8 inch long and 15 3/4 inch wide. I assumed that the given sleeve width of 3 1/2 nails is cut or laid out on a fold since the opening that the sleeve will be set into is also 3 1/2 nails long for an armscye circumference of 7 nails (the 15 3/4 inch width). Shoulder seams will be about 8 inches. Since this is a geometric garment, I didn’t want to cut off too much, so I dropped down an inch from the top outer corners and sloped up 8 inches towards the neck opening, which was the space left between.
Third paragraph; “In making up, delicacy is the great object to be attended to. Hem the gown at the bottom, gather it into a band at the top, and run in strings; hem the opening and the bottom of the sleeves, and put in strings. A broad band should be sewn in about half a yard from the top, to button round the waist.”
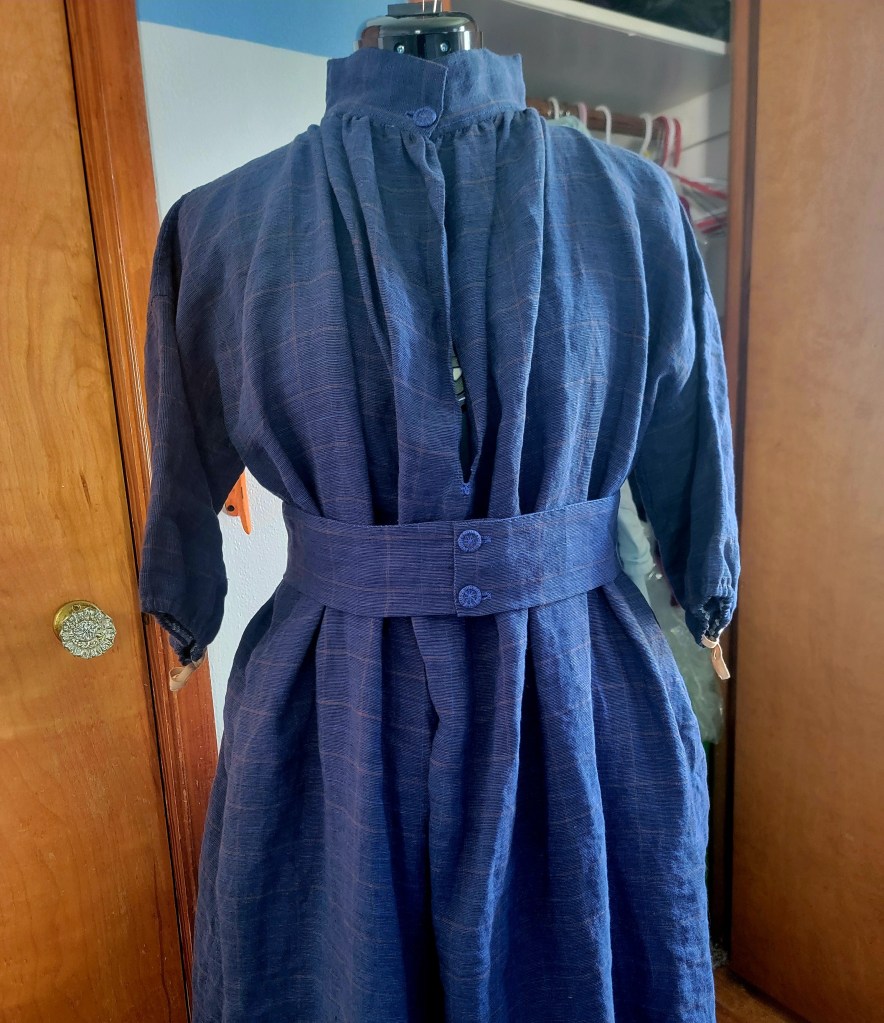
Alright, this is where things start to get more interesting, taking into account the illustration of the bathing gown given on the plate. The image has a button and buttonhole on the collar, instead of a band with a string, as well as the front opening appearing to perhaps be faced. There is also no indication of a band around the waist. Additionally, no dimensions are given for the collar band, so I made that a comfortable loose measurement for me. I also like the thought of a button rather than a tie at the neck, so I deferred to the illustration there as well. As for the band, I decided to go ahead and make one if there was extra fabric after I got sleeves and a collar off one of the selvedge edges of the fabric, which I did.
I planned to hand sew the entire thing, keep track of time spent, and do the thing where I utilize every single bit of scrap material at the end, so I don’t add to my scrap mountain or send anything to the landfill.
MATERIAL PREP AND CUTTING
Material list:
- Linen fabric – 2 yds, 59 inch wide from Burnley and Trowbridge
- Linen thread – I used 80/3
- 4ft of 1/4 in wide cotton tape
- metal rings for cloth wrapped buttons
For fabric prep, I zig-zagged the raw edges on my sewing machine and washed and dried it on hot to hopefully get most shrinkage out of the way. Then I pressed it and squared up the cut edges and measured to get the final dimensions I had to work with, a piece at 58 1/2 x 66 inches.

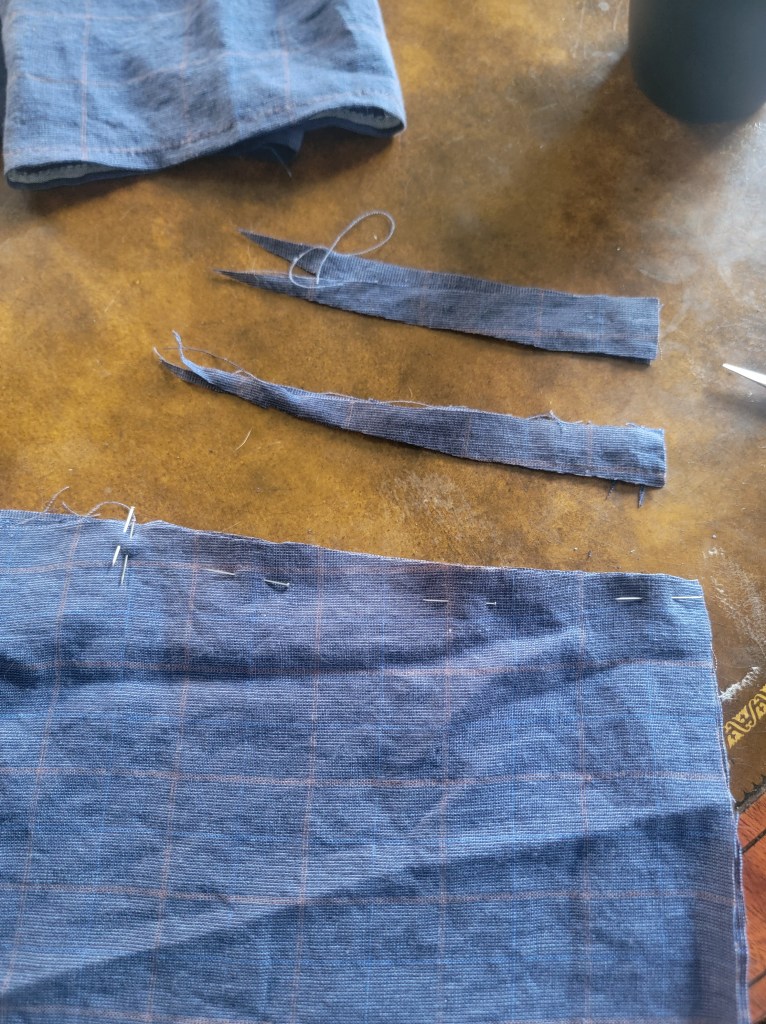
I cut a 10 1/8 inch strip (the sleeve length) off the whole length of one of the selvedge edges. From that, I cut two pieces the sleeve width of 15 3/4 inches. From the remaining piece, I split it lengthwise for one strip at 5 7/8 wide for the waist band and a second strip 4 1/4 inches wide for the collar. The body piece is folded under in the picture on the floor, but I wanted to give a better idea of the little pieces cut for this.

I saved the sloping off of the shoulders and cutting the neck slit for when I was ready to work those areas.
GARMENT CONSTRUCTION
Since other than “delicacy” and a rough order of operations, not a whole lot is specified in the directions as far as how to put this specific garment together. Back in the first chapter of the Workwoman’s Guide, the Lady goes over general sewing, seam-felling, hemming, and “stitching.” Since this garment is also rather shirt like, I also defaulted to some general shirt construction techniques circa the 18th and early 19th centuries.
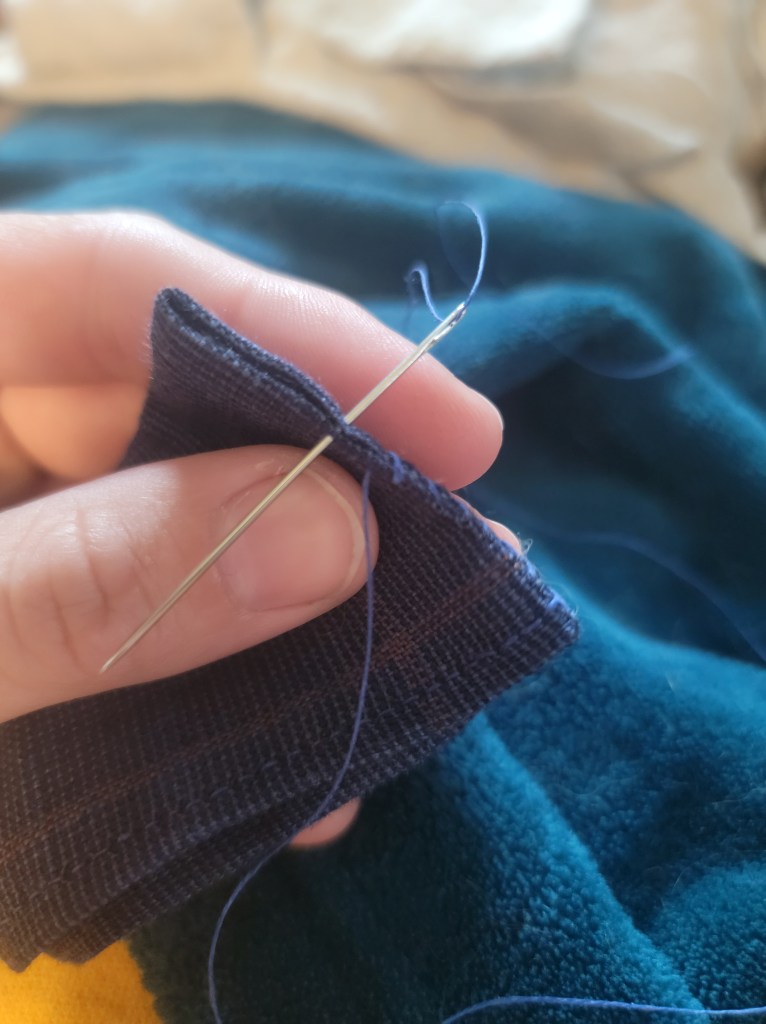
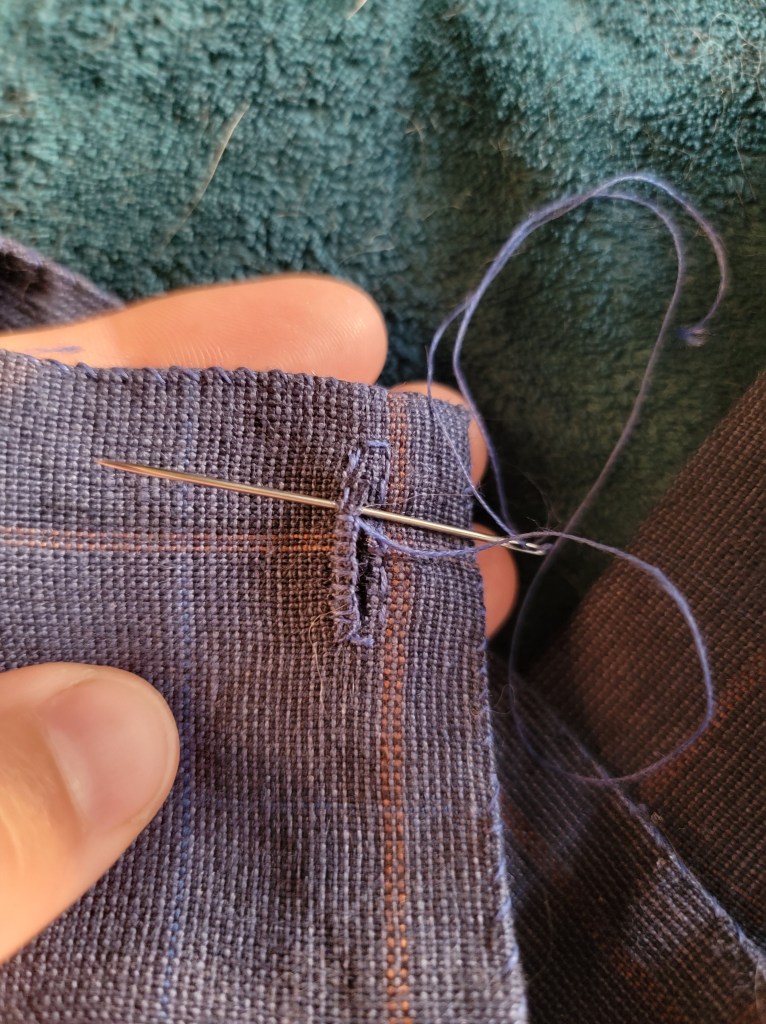
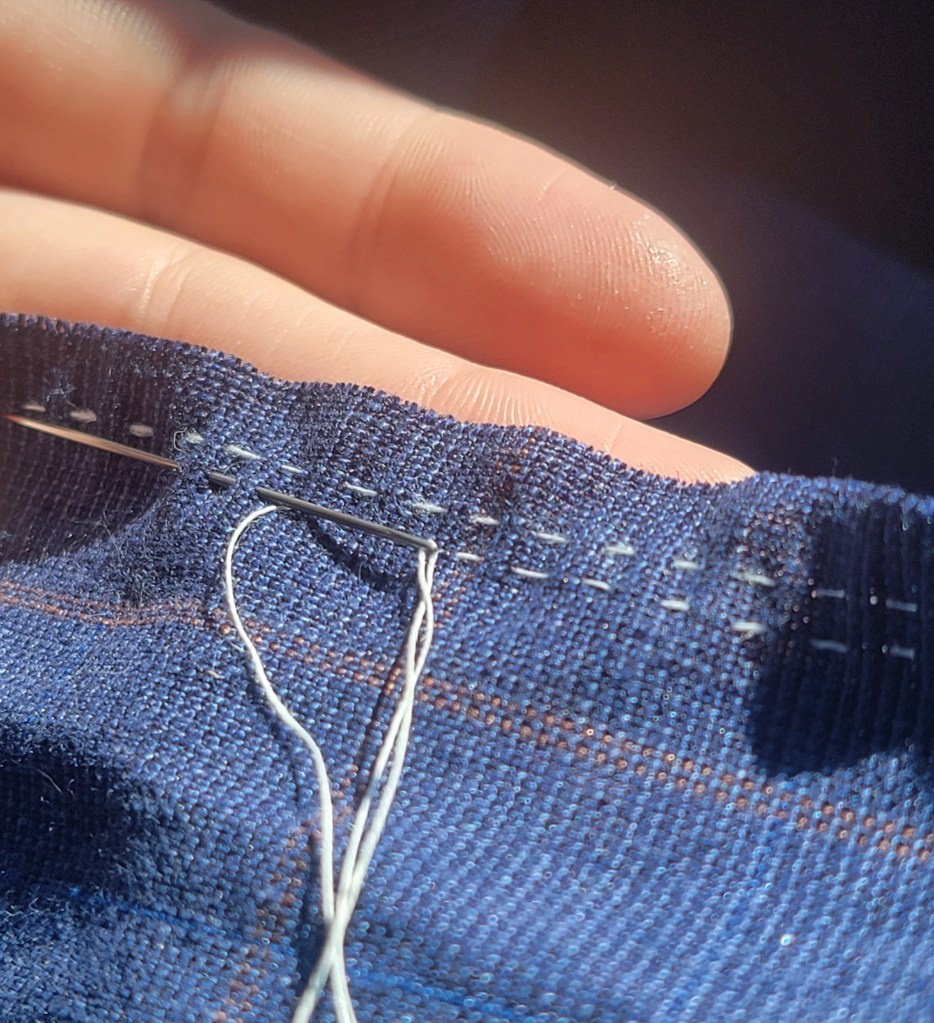
I started by pulling a thread from one long end of the collar piece, about 3/8 inch from the edge, and then folding 1/4 inch of the edge under and “stitching” through both layers along the gap left by the drawn thread using waxed linen thread. The goal is one stitch per 2-3 threads, but mine were probably closer to 3-4 threads. I also did most of this in bad evening light, which didn’t help.

After this, I folded the remaining three edges in about 1/4 inch as well, and then folding and finger pressing the entire collar piece lengthwise, matching up all the lines in the fabric as I went. I then whipstitched the two short ends closed and finished the collar prep by working a buttonhole on the right front side, about 3/8 in from the open bottom edge.
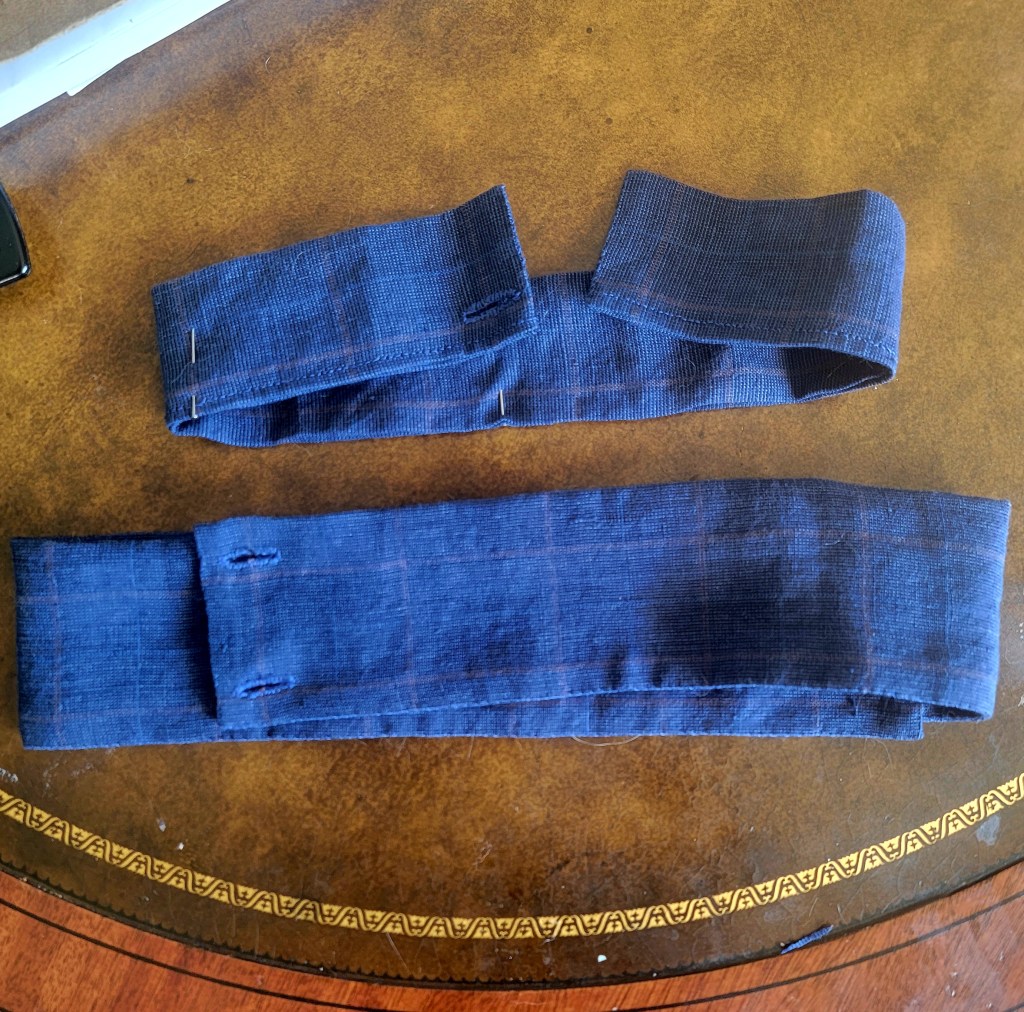
I then moved on to the waist band, folded in all the seam allowances and whipstitched all three open edges. I finished this with two buttonholes on one of the short ends.
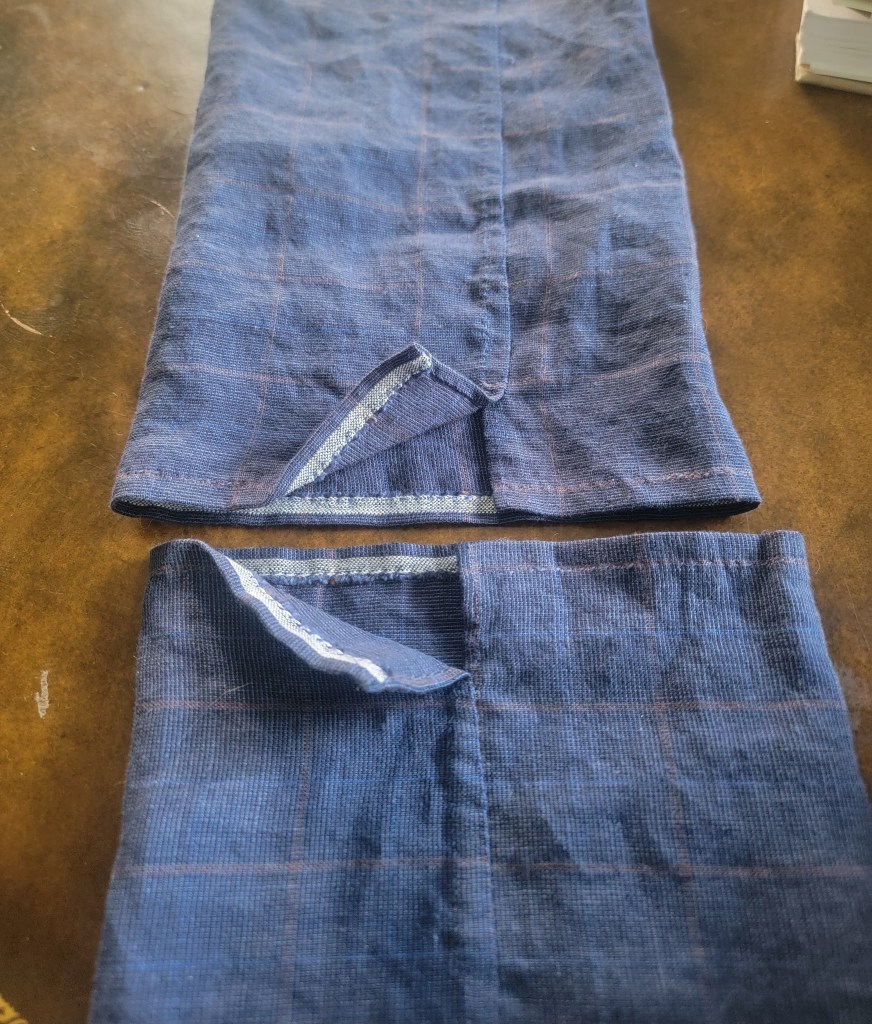
After this came the sleeves. Since these sleeves have no gussets, and are on the shorter side, they came together pretty quickly. The single seam on each is flat felled, first by folding the top edge 1/8 inch under and whipstitching it down, flipping it inside out and folding the inside edge into the seam and whipstitching that down. This is where having a striped linen really comes in handy as it is much easier to follow straight lines. I left a small opening at the bottom of the sleeve and hemmed that with a narrow hem. I left the selvedges for the sleeve hems and instead of folding the hem twice, I only folded it once, leaving enough room to run a tape through later, and whipstitched the selvedge edge down. Now, I’m not sure it really mattered, but I made sure to make a “right” and a “left” by ensuring the very slight overlap at the slit on the second sleeve was opposite that of the first.
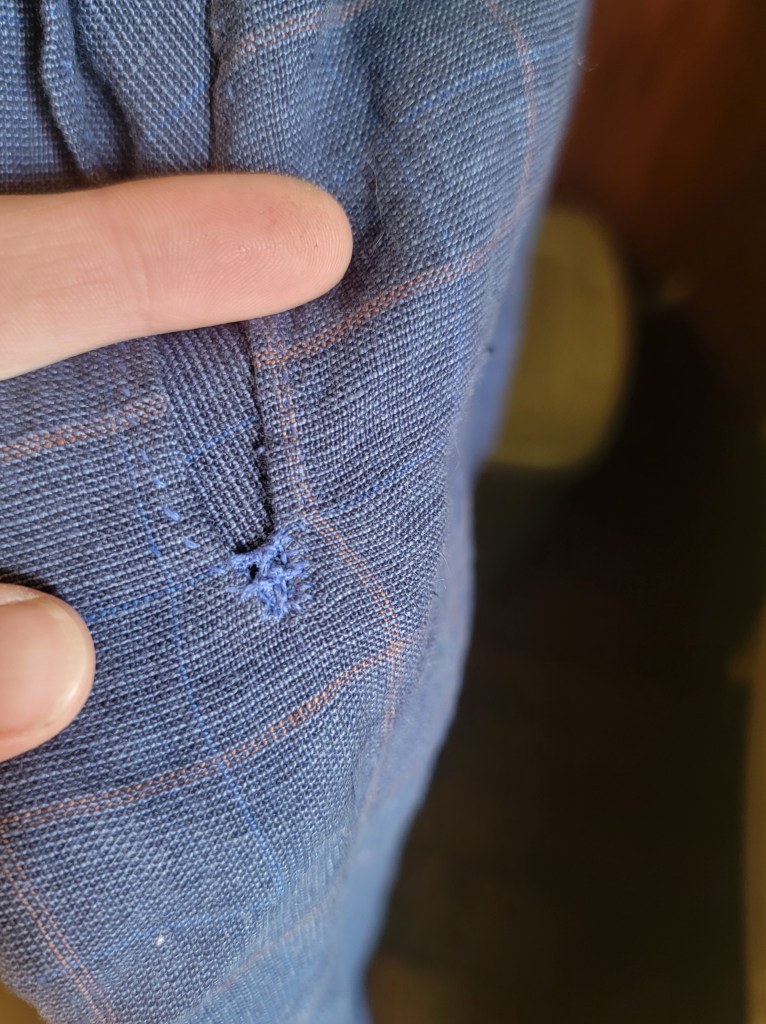
I then sloped the shoulder seams, adding some little triangular snippets to my scrap pile. The shoulder seams were felled as well. This was followed by cutting and hemming the front slit. I reinforced the bottom of the slit with some decorative buttonhole stitching.

I then gathered the neck opening with two rows of stitches, roughly 1/8th inch in width and attached the collar by whipstitching the peak of each pleat to the previously folded and stitched bottom edge of the collar, working from the outside. I then finished the inside of the collar by whipstitching the plain folded edge over the gathered seam allowance on the inside.
The side seams were flat felled as well, along with setting in the sleeves. I found it easiest to fold about a 1/8 inch of the edge of the body piece under, and then pin that into place on the outside of the sleeve about 3/8 from the raw sleeve edge, sew the sleeve in first, then continue that fold on the front edge down the side seam and then flipping everything inside out and folding under and felling the inside. This required only on little snip of seam allowance in the inside at the juncture of sleeve and body for everything to sit right.


I then finished the bottom with about an 1/2 inch hem. Really no precedence for width here, that just how it folded nicely along one of the lines in the fabric.
FINISHING TOUCHES
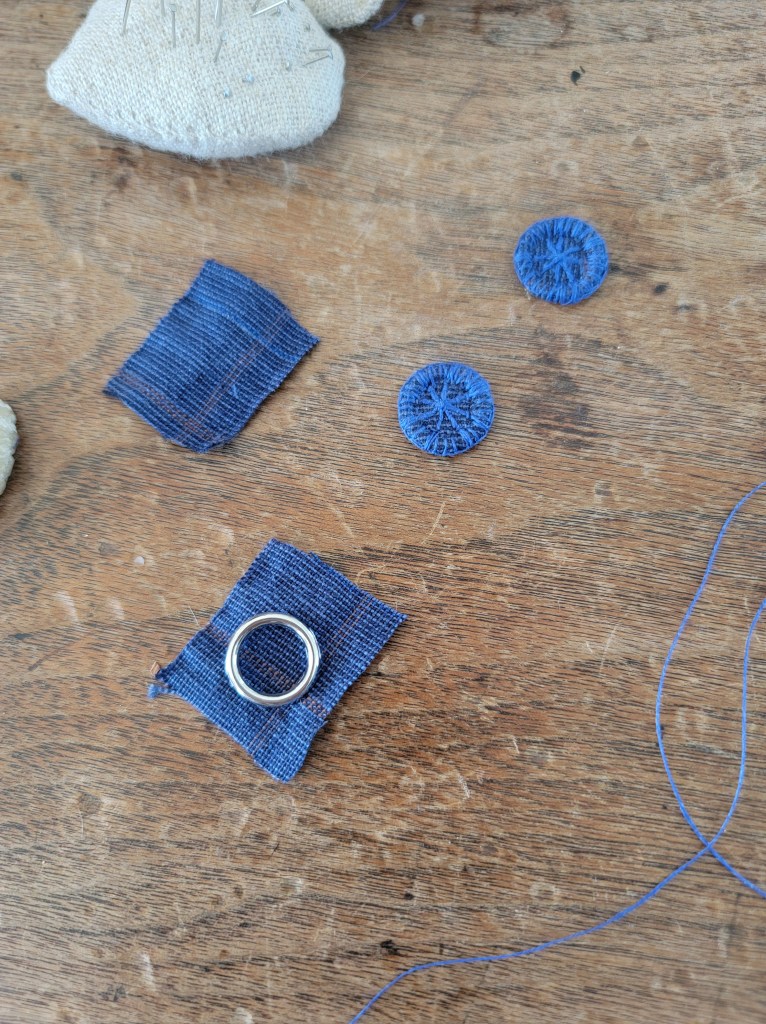
I opted to make some fabric covered buttons using the directions early on in The Workwoman’s Guide. I got some metal rings at my local JoAnn’s and used scraps of linen to cover them, working around the edges with a buttonhole stitch and doing a little embroidery in the middle.
One buttonhole went on the collar and two others went on the waistband.
I then took my length of cotton twill tape and tea-dyed it. I was aiming for a reddish brown to the match the brown stripes in the fabric. This was just me being matchy-matchy. I hemmed the edge of the tapes and inserted them into the sleeves, stitching the center point of the tape to the top edge of the sleeve within the channel just to prevent the tape from getting off center -or worse- pulling out of the channel completely.

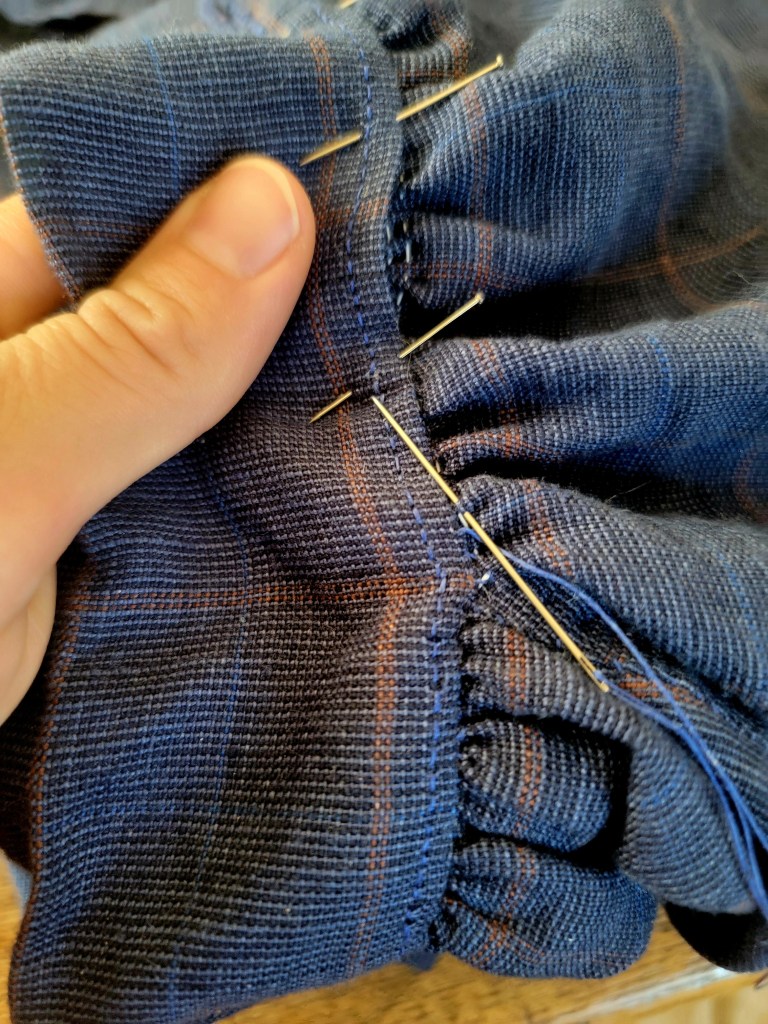
Then came the waistband fiasco. The ambiguous directions concerning it was little help. I first tried gathering the back of the body to the band, then pleating, then tore it all out and procrastinated for a few weeks. I took turns pinning things in place on the dress form, trying it on, not liking it. Tried doing it flat, but same thing. Because there are no neck gussets, even with the slightly sloped shoulder seams, nothing about the gown itself hangs perfectly strait, so everything kept coming out wonky. Parts would blouse, parts would be snug, and everything would change with any sort of movement.
So… after a really long time of just thinking about it, I decided to not sew the band on at all (at least at this point). It currently buttons on as a belt-like waistband, and then can be completely removed to allow the garment to do what it is intended to do; not restrict any sort of water during bathing.
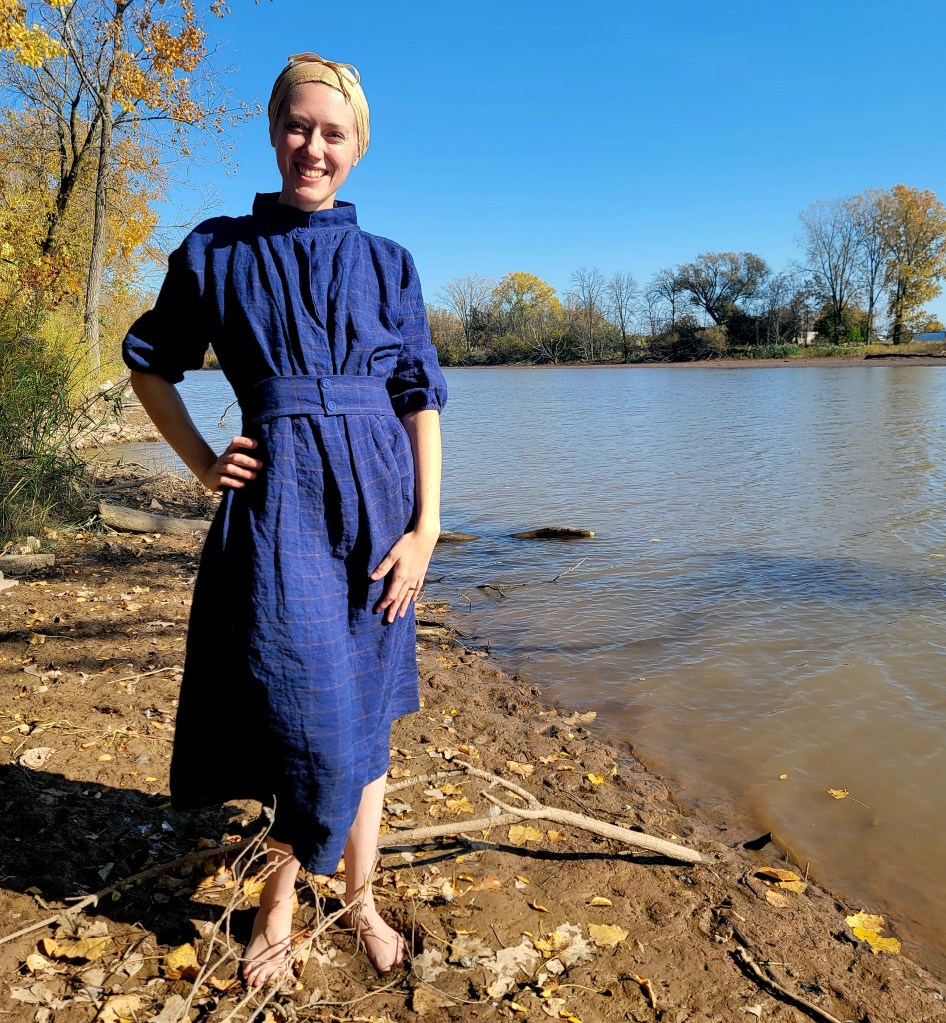
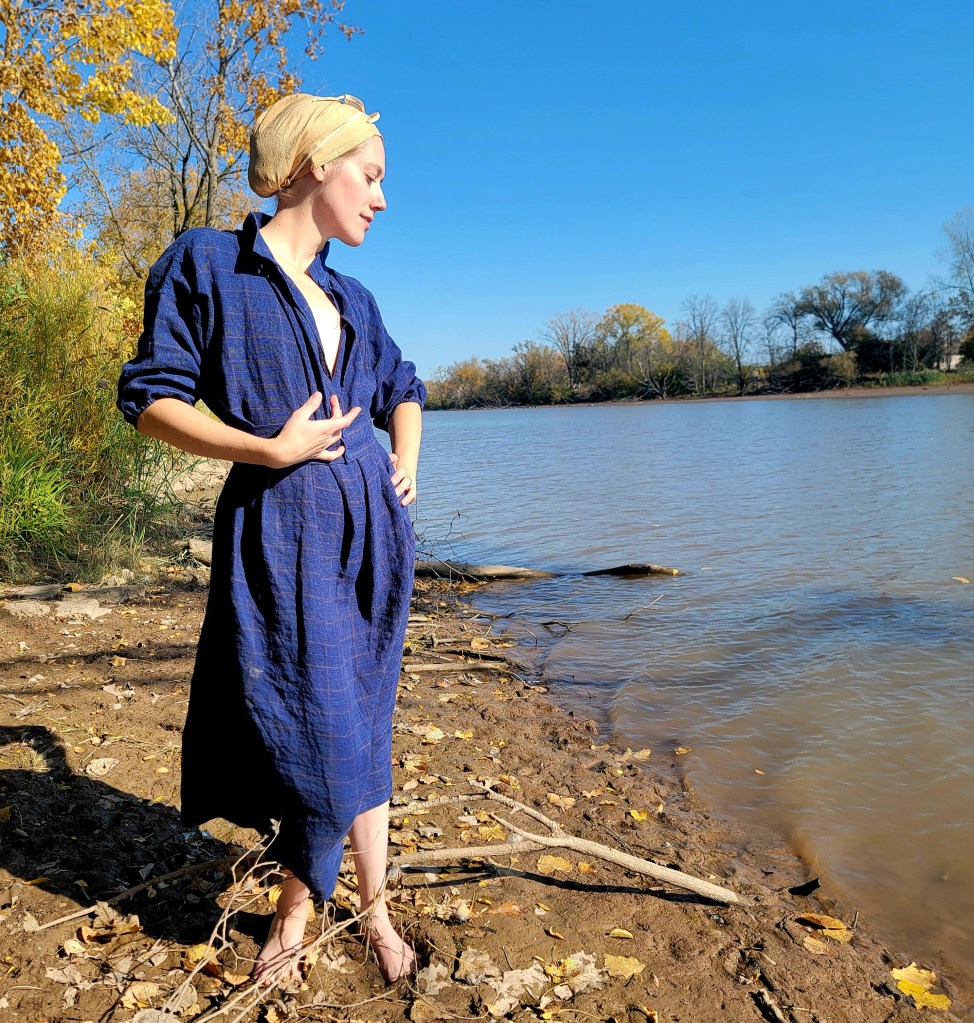
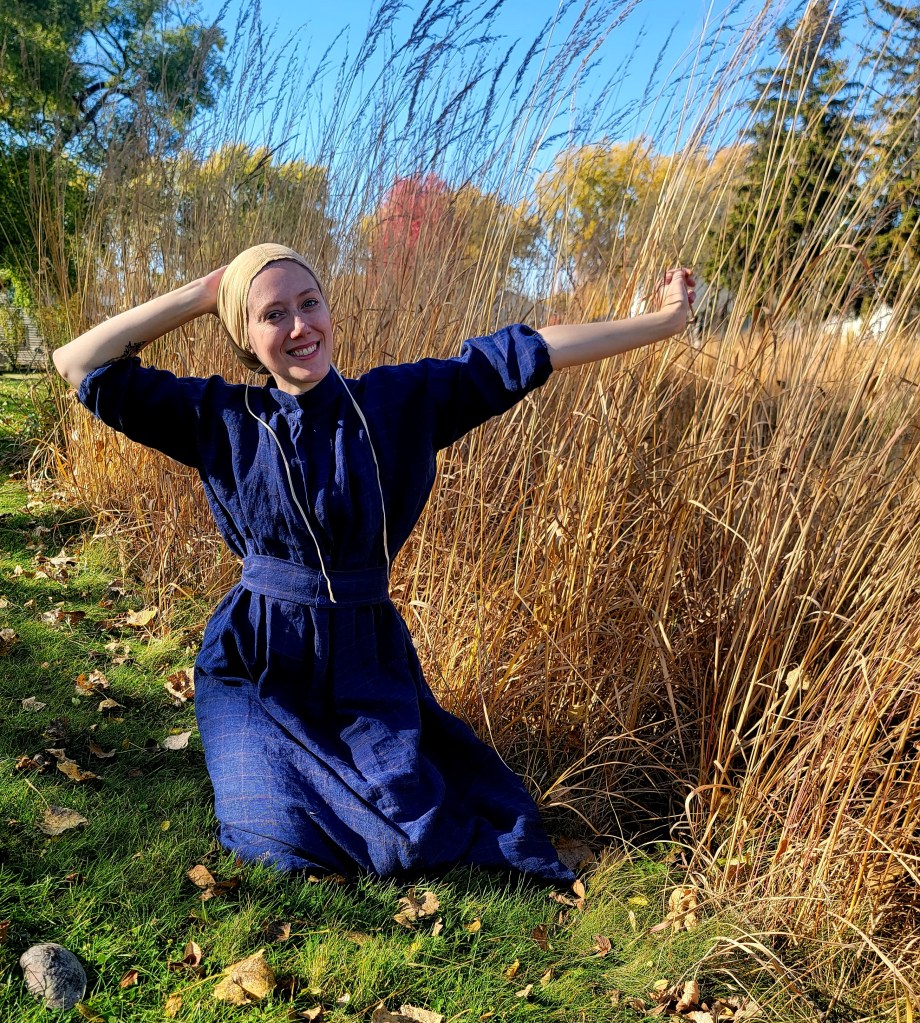
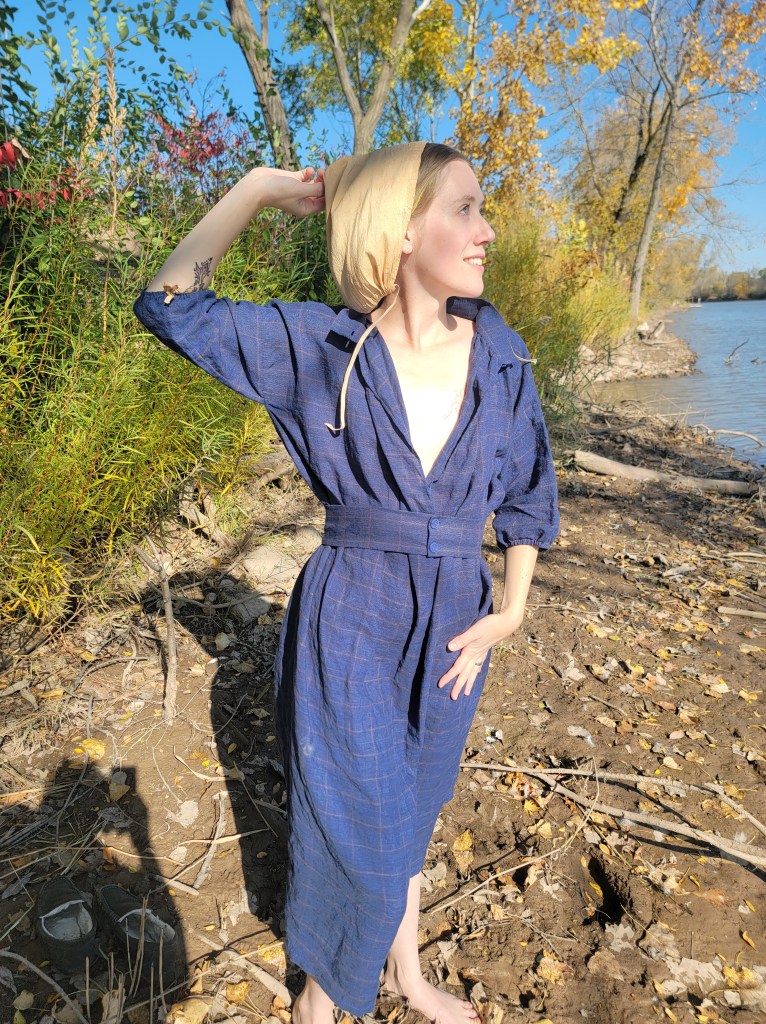
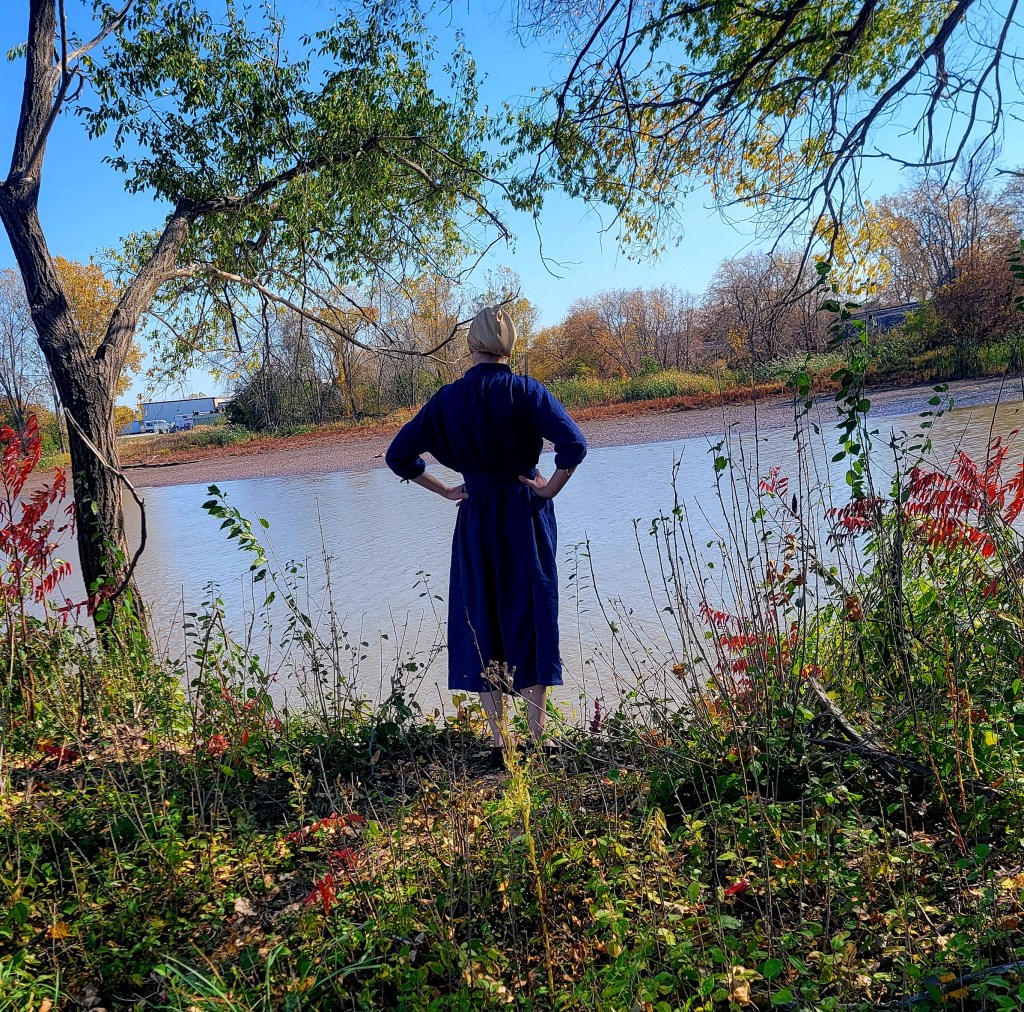
Finally, I whipped up a bathing cap to go with (I’m hoping to do another shorter post on the cap as its proven to be quite fascinating) and got some quick fall photos by the river near our house. I’m hoping to give it a better test next summer in warmer water. Overall, I’m very pleased with this garment and how it fits, especially since I didn’t attempt to alter the measurements given in the Workwoman’s Guide. If it had not fit, it would have simply been a living history demonstration item. If I were to make one again specifically with the intent of wearing it, I would likely lengthen the sleeves a few inches, so the gathers sit comfortably below my elbow as well as adding in neck gussets for a smoother neck/shoulder fit.
Let me know what you think! Without further ado, here are the photos of the finished piece. Some are buttoned, some are… unbuttoned it is a swimsuit shoot after all.


Leave a comment