PLANNING
I wanted to make a bathing cap to go with my 1830’s bathing gown after realizing there were also directions for the cap in “The Workwoman’s Guide” by A Lady (1838). Unlike the gown, there is no corresponding image and the directions are pretty brief.
On page 68 of the book, the author writes, “Bathing Caps; These are made of oil-silk, and are worn, when bathing, by ladies who have long hair. Cut a piece of oil-silk, 4 nails long and 8 nails wide; double it to make a square; let the doubled part be the back of the cap, and slope off the corner at the top, towards the back, in a curve, so as to shape it to the form of the back of the head. Sew up along the top of the bathing cap, binding it with tape at the seam, both at the top and in the front. Lay on a tape behind to form a hem, making oylet-holes at the ears, and passing a string through each oylet-hole, which is fastened down at the opposite side; these strings draw up the cap, when worn, to the size required.”
Of course, I do want to make a cap from oil-silk, but must first make the oil-silk and that process is several months in the curing, so decided to make a functional mockup out of regular silk to see how it goes first. Because this was a pretty small project, I opted to use some scrap taffeta from my stash that had been previously washed. This was also going to be a hand-sewing project, and I didn’t figure it would take very long as most caps can work up in an afternoon or less.
MATERIAL LIST
- scrap of cream silk taffeta
- 2 or so yards of 1/4 inch cotton tape
- cotton thread that I had on hand
- muslin scrap for a mockup
CONSTRUCTION
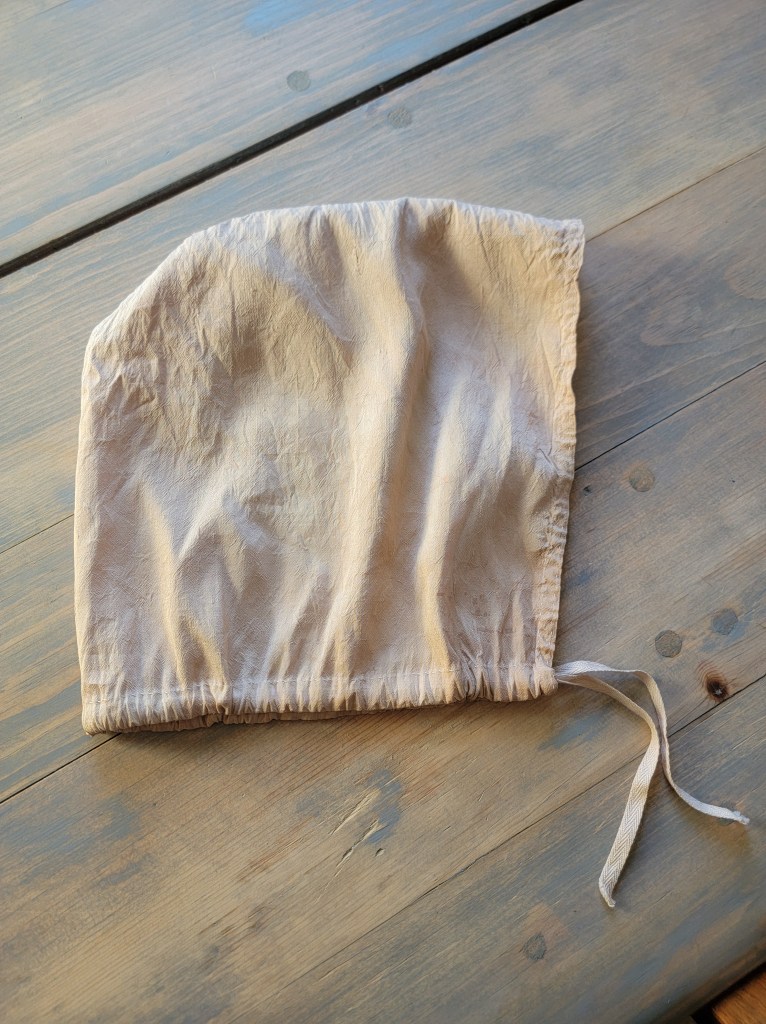
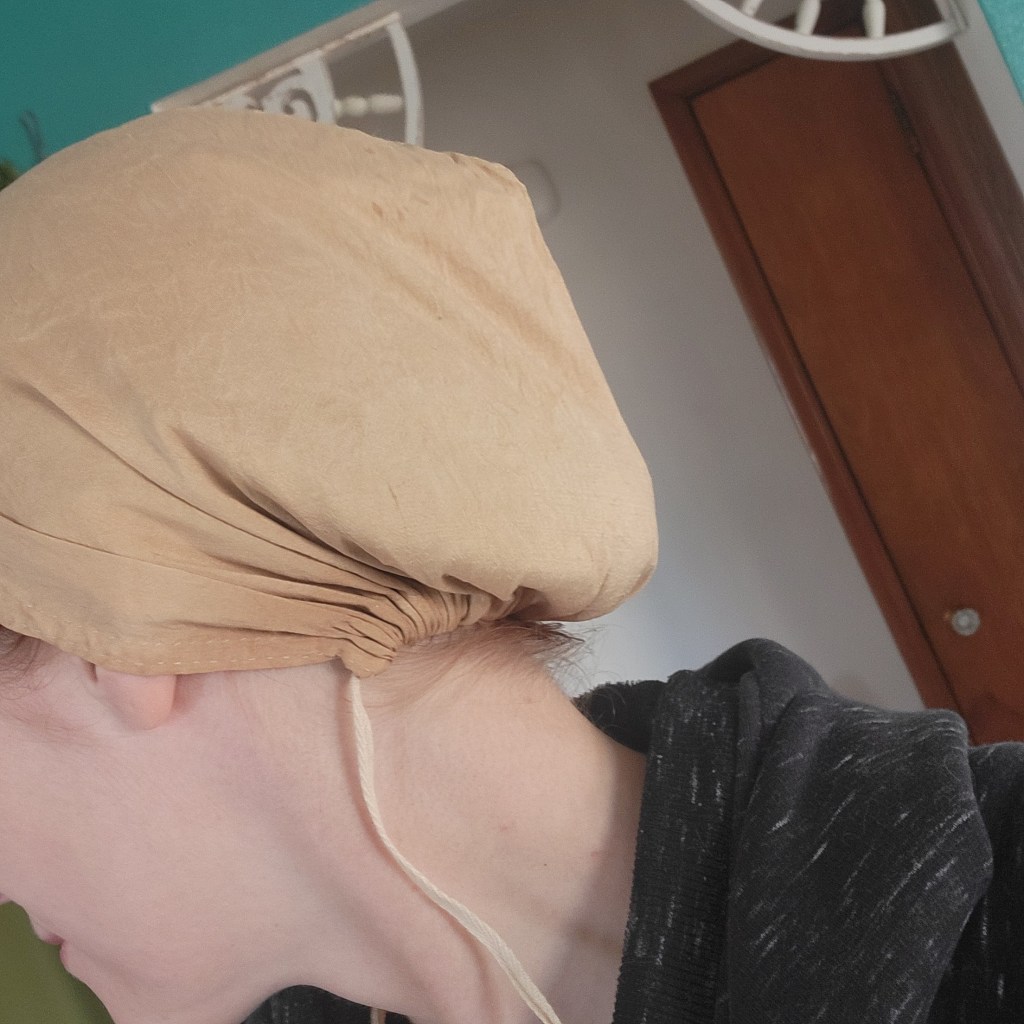
I started with a mockup, using the dimensions giving by the author, 4 x 8 nails or 9 inches by 18 inches. I folded it in half, pinned one of the edges adjoining the fold, popped it on my head, and decided immediately that it would be too small, especially with any sort of seam or hem allowance. Also, as the tape I had on hand was only 1/4 wide and intended for the tie, I would need to make a self-channel for the tape and that would require additional material along the bottom back for folding up. So, I made a second mockup about a nail (2.25 inches) larger in each direction. I ended up trimming some off the front edge, but the back suited my needs well.
I cut the rectangle out of silk, and while wearing it, pinned the slope to fit the top back of my head. I then sewed this seam, trimmed the seam allowance to about 1/8th in and pressed it open, setting the cotton tape over it and felling it down.
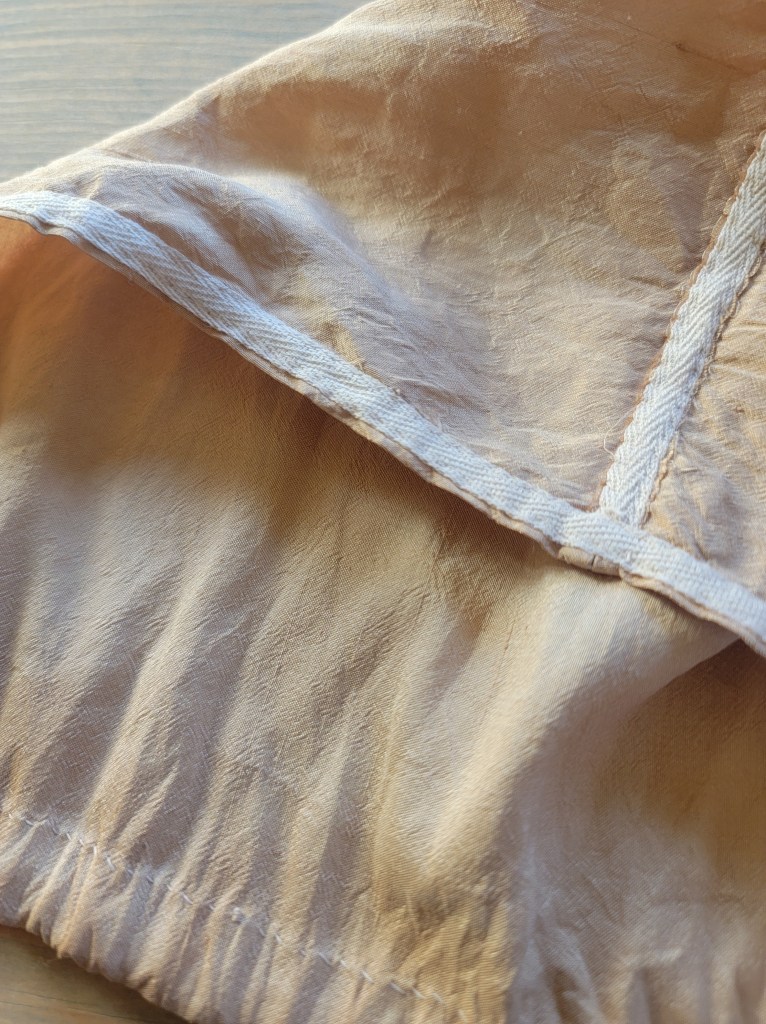
For the front edge, I folded the edge of the silk in and laid another tape over it, stitching down along both sides of the tape.
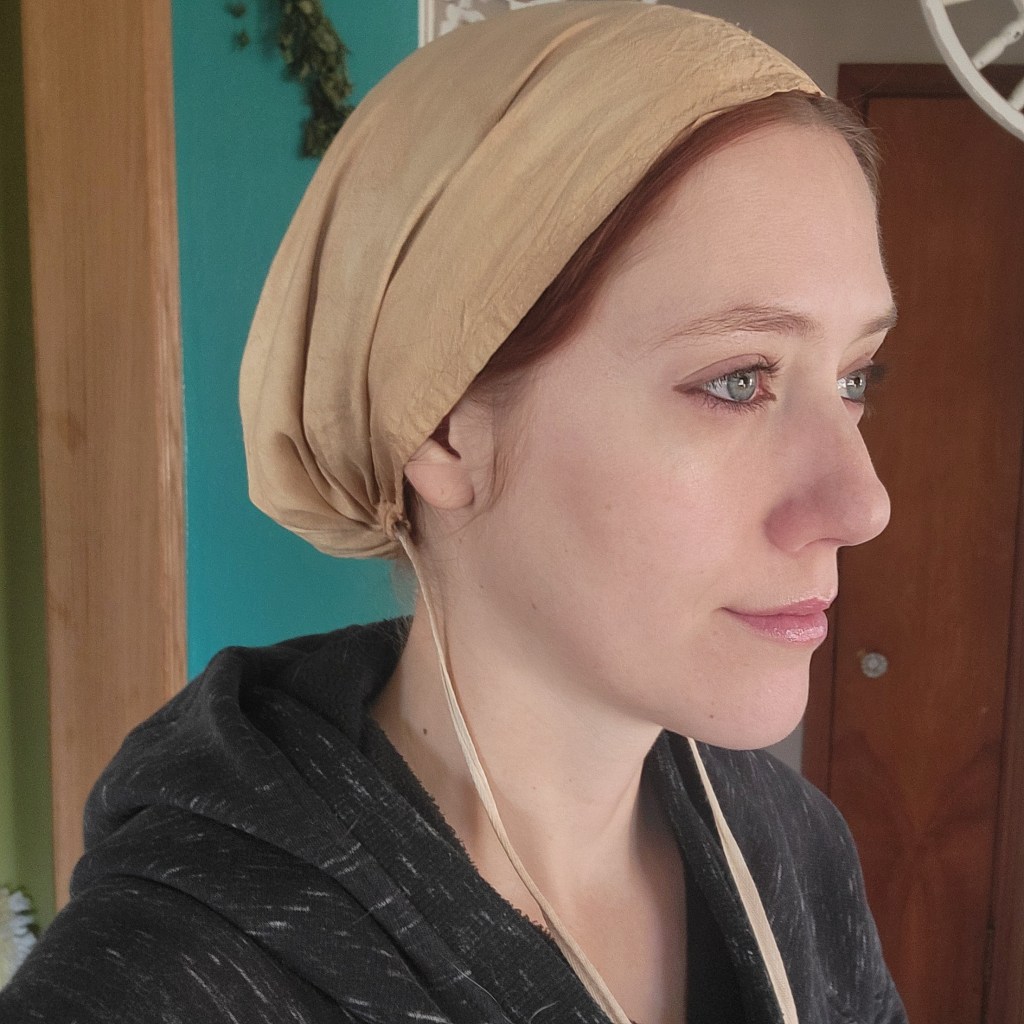
For the back bottom, I folded up the fabric twice to create a channel about 1/2 inch wide. I didn’t make eyelet holes, as I figured the natural openings on each side would suffice for this version. I’ll aim for working eyelets on the eventual cap. I ran two ties through the channel, sewing one end of each down within the opposite openings.
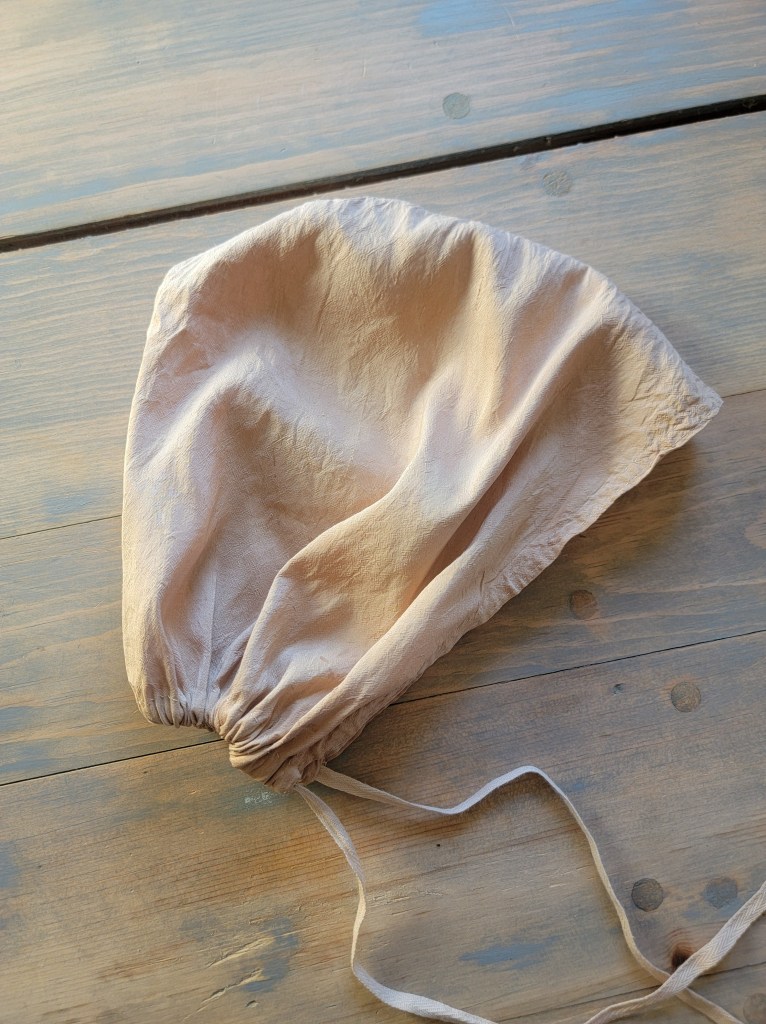
I’ll be honest, up until this point I was still a little baffled about how this was supposed to work. But, I put it on, pulled the ties a bit at a time, tucking in any loose hair, and voila! It stays well without tying, but to get the ties out of the way, I tied them up around the top of my head.
Also, as a totally unnecessary side-quest to fulfill my aesthetic, I tea-dyed the whole thing giving it a “well-used” or Nankeen color to match the ties in the bathing gown itself.
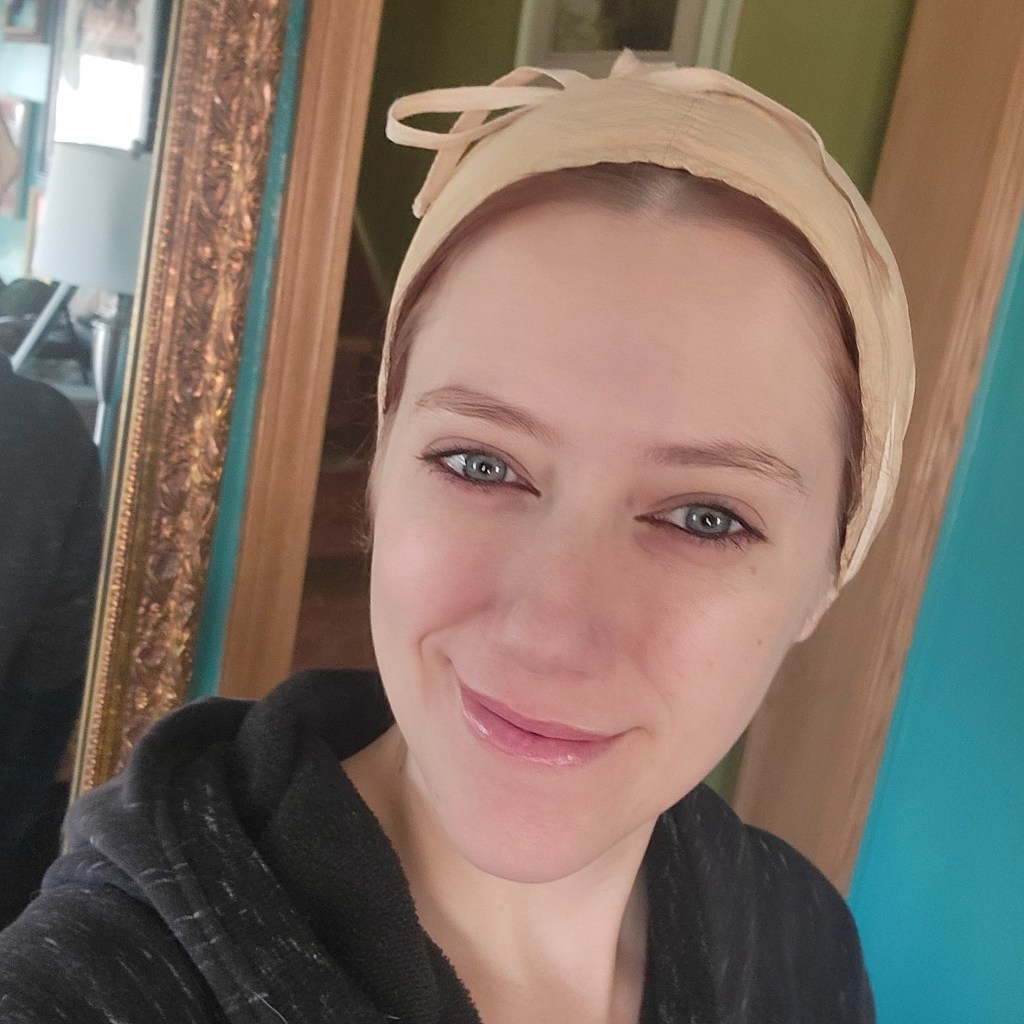
It’s quite secure and actually pretty comfy and I’ll admit I’ve worn it around my house just to keep my hair up and out of the way without using hair ties! I am excited to try out the eventual actual oil-silk version one of these days and test it out in an actual ‘bathing’ experience. Let me know what you think!


Leave a comment