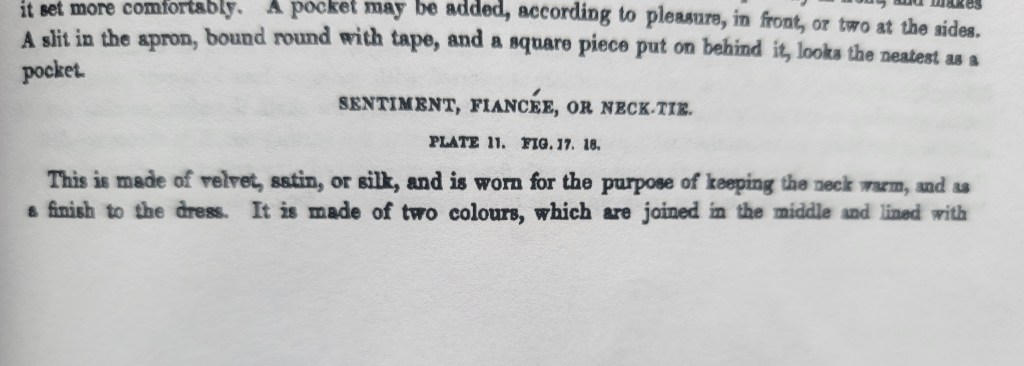
INTRODUCTION
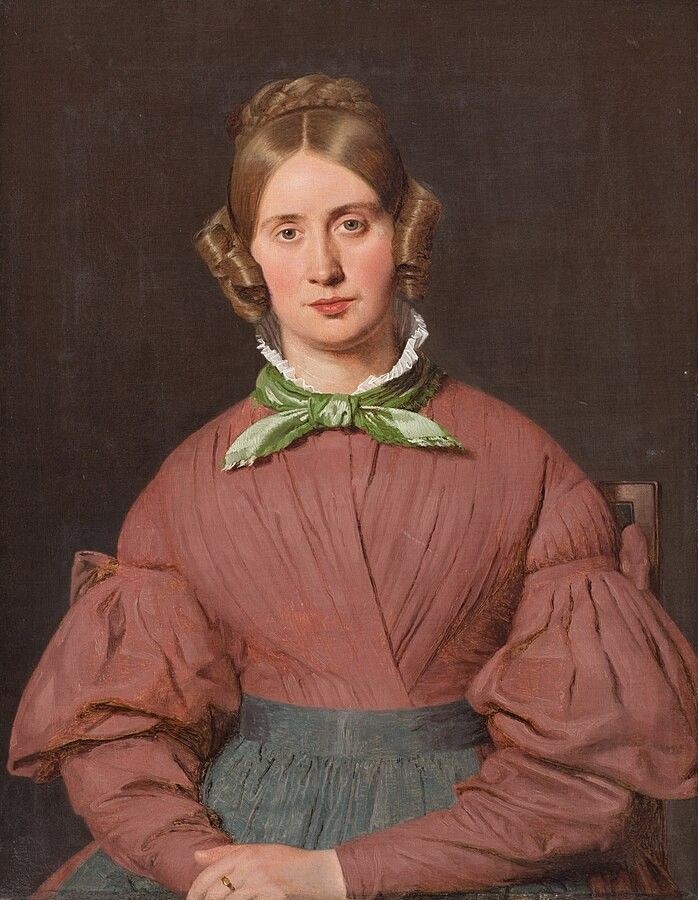
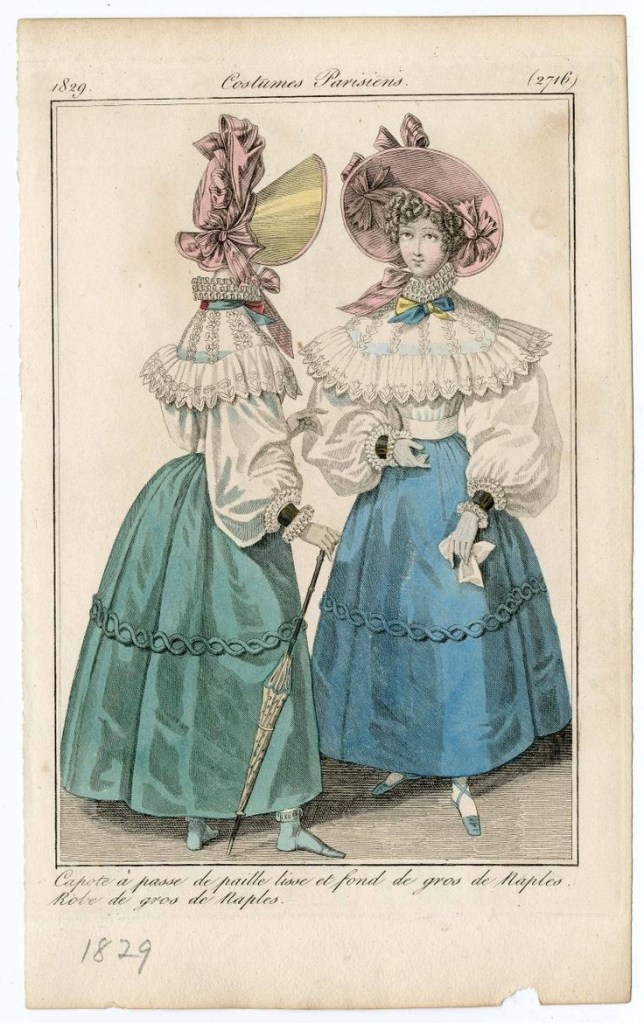
A fun little detail of 1830’s dress are neck-ties, a type of garment quite similar to the cravat. There are a whole array of neck-ties seen in fashion plates and paintings from the decade. I found suggested directions for “Sentiments, Fiancées, and Neck-Ties” in the Workwoman’s Guide (1838). I have seen extant bows in a museum collection somewhere, but at the onset of this project, I could not locate them, so if anyone has seen them, please let me know!

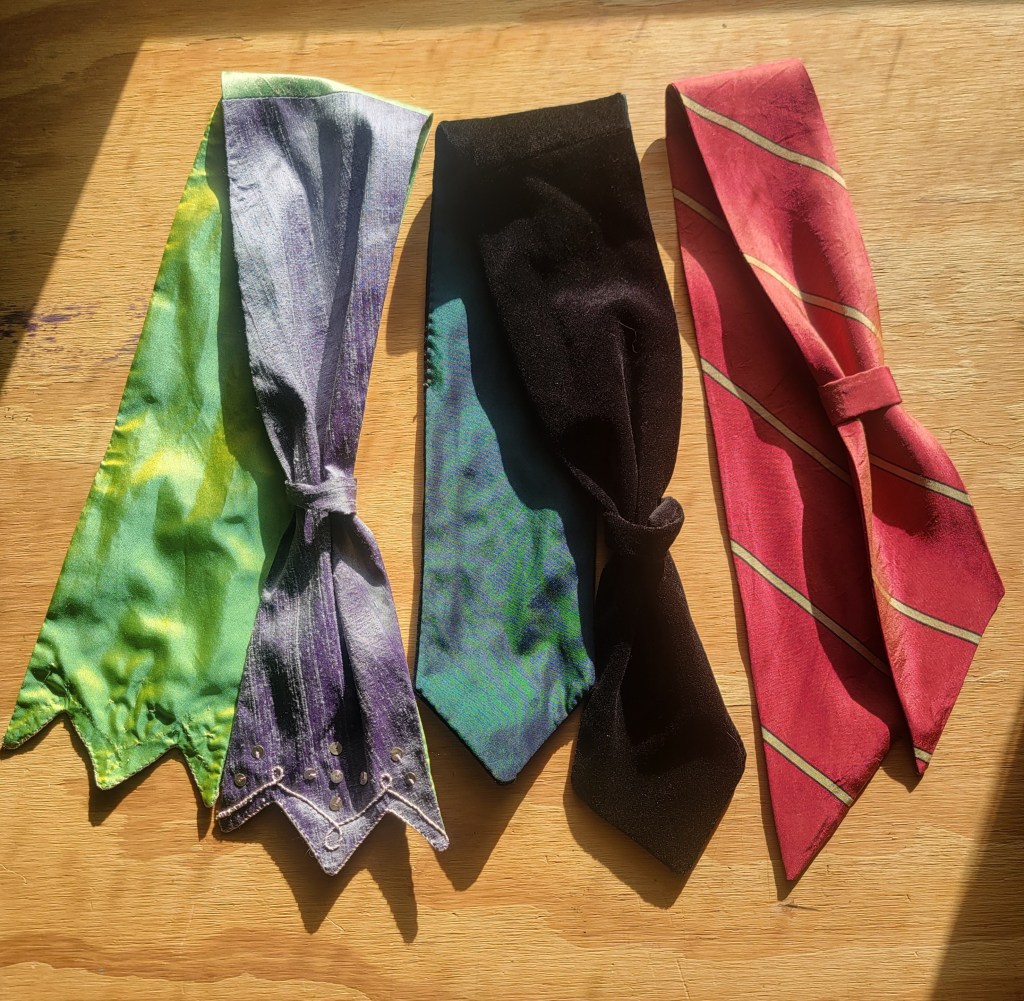
I made three different styles, and there’s a few more I might try out down the road. This was a fun, quick, scrap busting project that I completed over the course of an afternoon. I did machine sew some parts, but- honestly- it would not have taken much longer at all to do by hand.
PATTERN
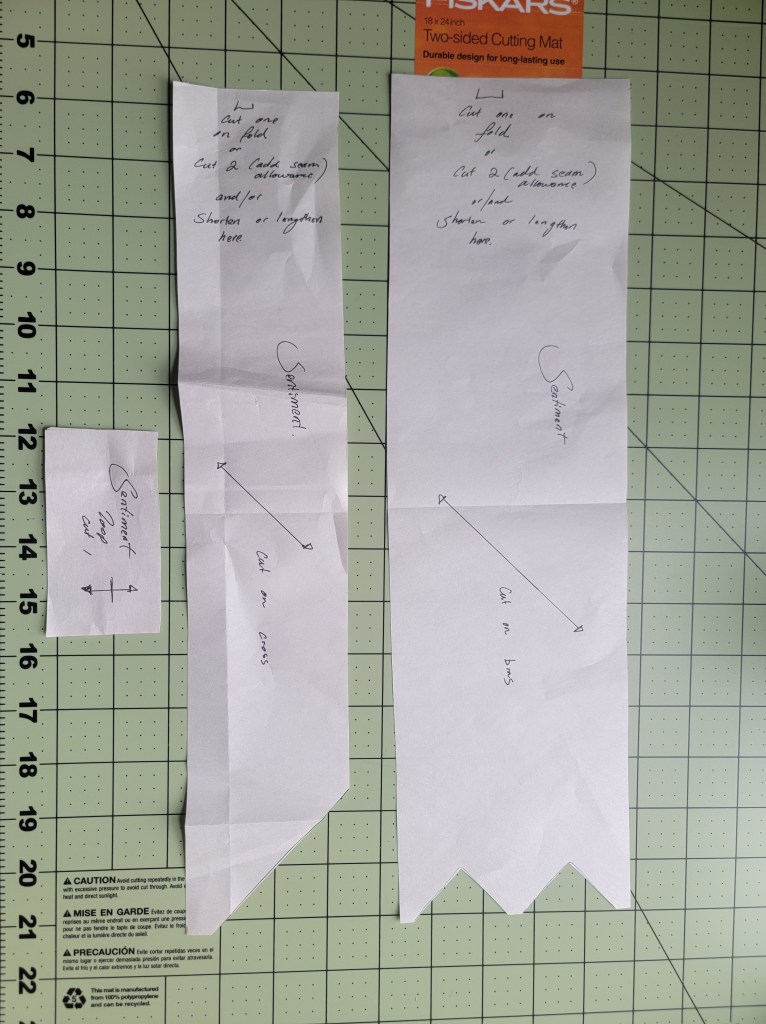
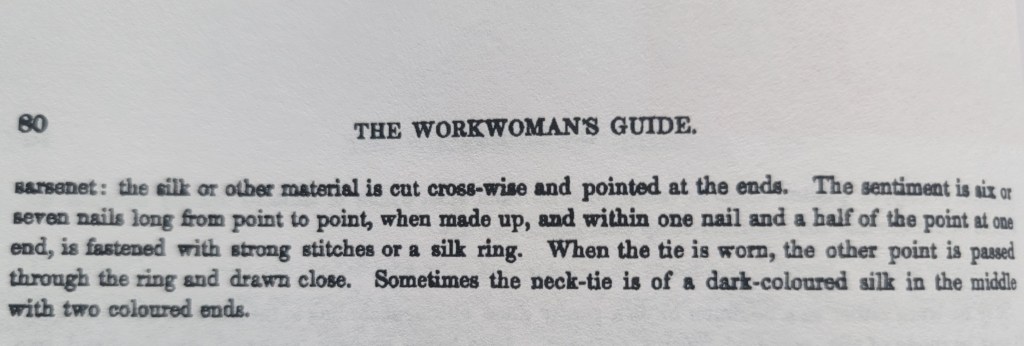
A quick note on the pattern before I get to the fancy stuff; while the Workwoman’s Guide gives a good initial idea of desired length and shape, she doesn’t mention a width, so I made each of these three with different widths. The suggested finished length of 7 to 8 nails (15 3/4 to 18 inches) also proved too small and tight for my neck, so I ended up making mine longer, finishing out between 11 and 12 nails (25-27 inches). After I finished these, I took their pictures on my dress form, and realized her neck is larger than mine at smallest, so they sit a bit odd, but at some point, I’ll get photos with them actually on me. I dabbled with three different shapes for the ends, the diagonal slant, a centered point, and dagged edge.

MATERIALS
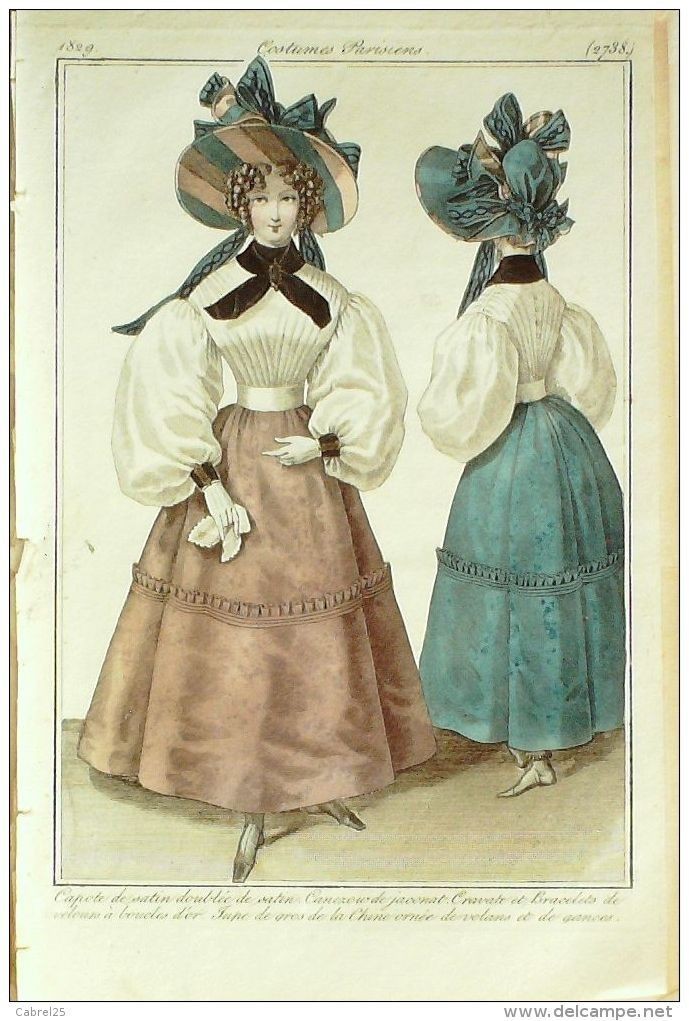
The Workwoman’s Guide suggests velvet, satin, or silk, and lining with sarsenet. One 1829 fashion plate from Costumes Parisiens sports a ‘Cravate et Bracelets de velour a boucles d’or” or neck-tie and bracelets of velvet with gold buckles. The author also seems to indicate that all of this type of neck bow should be parti-coloured, and while there are certainly some fun multi-colored examples in fashion plates, there are also many others made from a single fabric.
This was a scrap-busting project, and I used a lot of odd-shaped scrap pieces. I used scraps of cotton velvet, and then silk dupioni, taffeta, and tissue silk. Back in the day I used to wash all my silks (cue horror cringe), so nothing got washed again, just a really good pressing. If I were to purchase or use new material and have space to cut correctly on the cross or bias without a seam in the center, I would suggest 1/2 yard each of outer and lining.

CONSTRUCTION
Alright, so the directions in the Workwoman’s Guide are pretty vague, which is OK because the concept here is pretty simple if you’re simply adopting the finished look. It’s frustrating though because I want to know the details of how they would have made a simple neck-tie it 200 years ago, and again, the extant I was looking at decided to hide in the internet when I went to take a closer look. But – vent over- here is all the information given by the authoress.
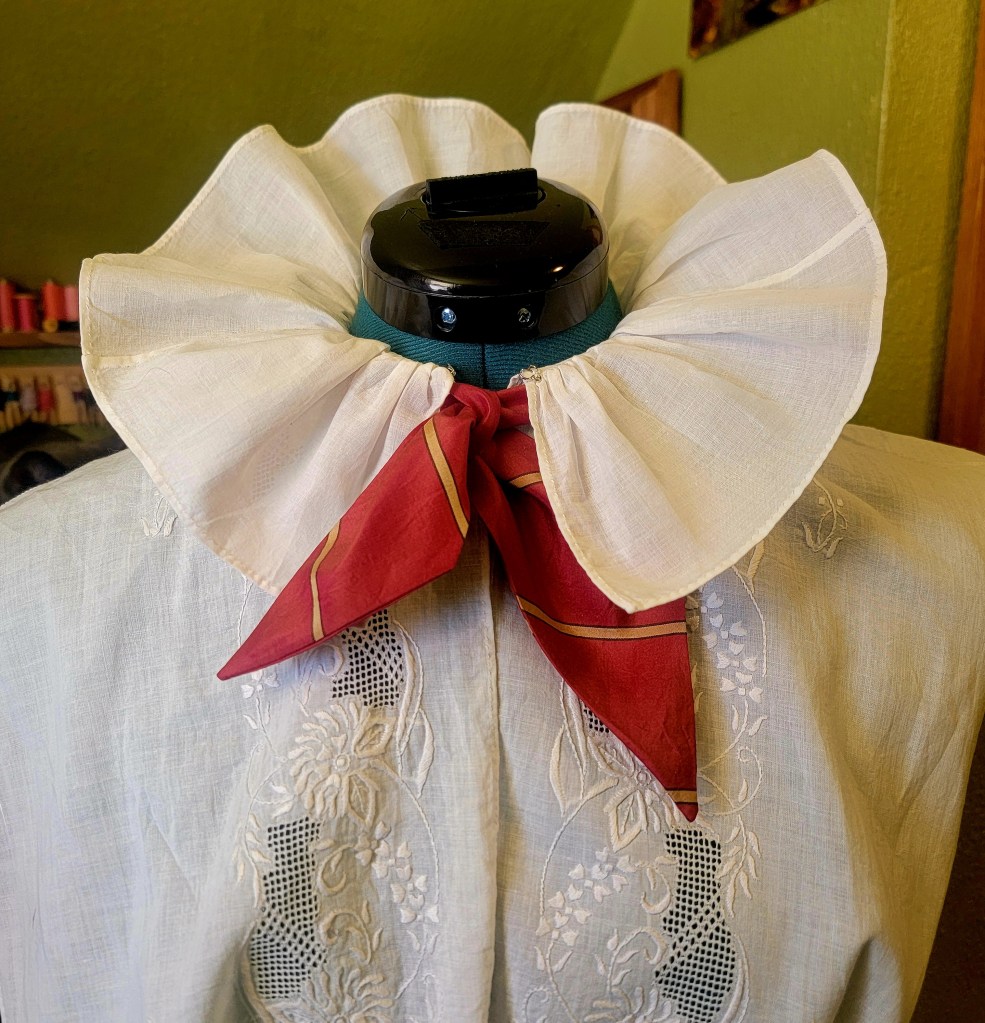
- Red and Gold-Striped Silk
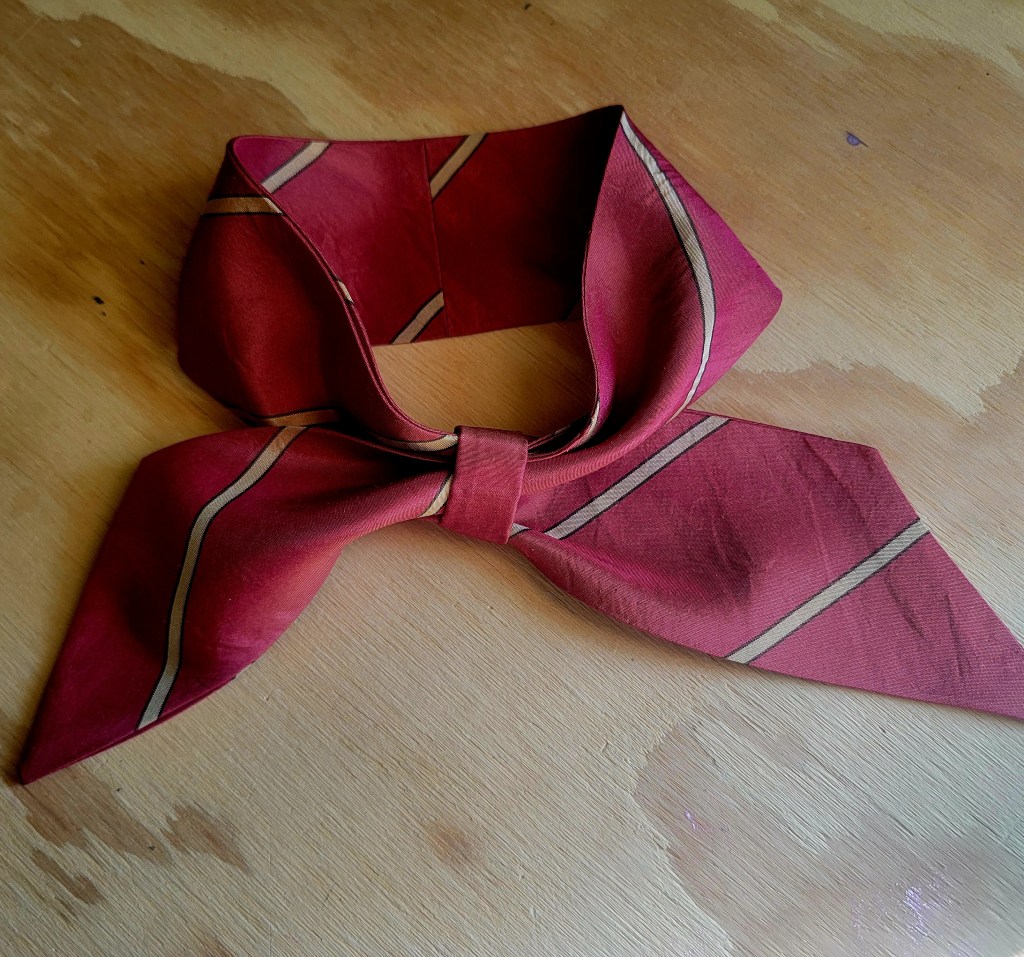
This first one is made from striped silk taffeta from a project I abandoned about a decade ago, but on fresh glance, the fabric just screamed necktie appropriate. Out of the three, this is the one closest in shape to the diagram in the Workwoman’s Guide.

Other than the loop, this is cut on the bias. To be conservative with my fabric, I did end up piecing the self-lining via a center back seam. By machine, I sewed right sides together, then I clipped corners, turned and pressed. I sewed the opening shut with a slipstitch and attached the loop to the lining side with whipstitches where it felt most comfortable.
- Black Velvet

I made this one slightly wider than the first one and moved the point up from the lower edge to the center. I used black cotton velvet and lined it with dark blue-green silk taffeta. Both the outer and lining on this one got pieced up the center. Once again, I sewed right sides together, then clipped corners, turned, pressed, stitched the opening shut and added the loop where it felt comfortable.

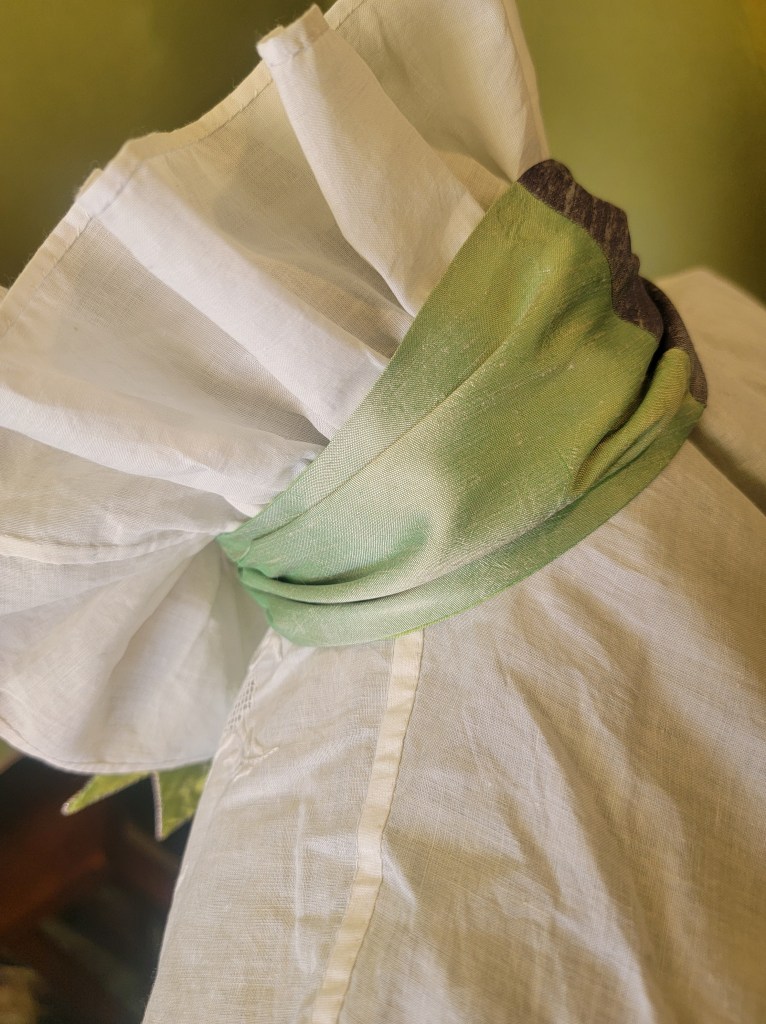
- Parti-Coloured Dupioni
Alright, this was the fun one, both in shape and color! This one is the widest of the three at 4.5 inches.

The outer is made from two different colors of silk dupioni, perhaps not the most accurate of weaves, but I really loved the colors together and wanted to do something with the scraps. I had very little left of the purple, not enough to cut properly on the bias so this one is just honestly cut from where it fit slightly off straight of grain and the other pieces were cut to match. The lining is a bright green tissue silk from another abandoned project.
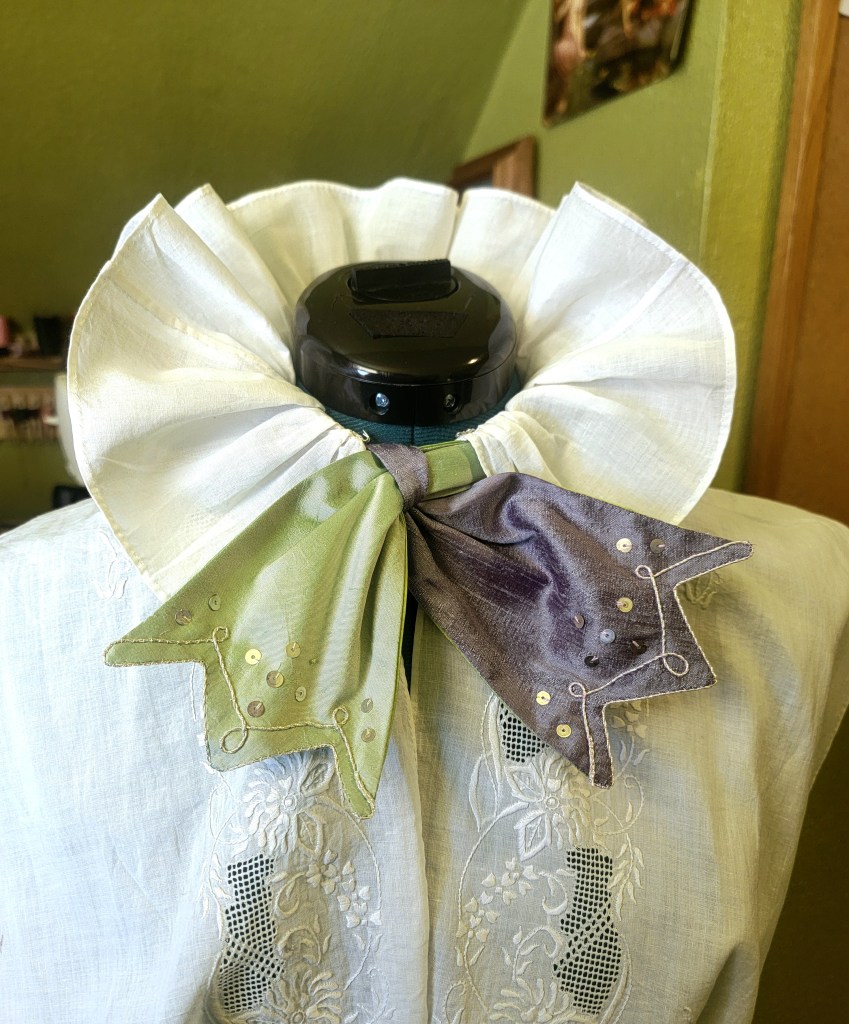
Construction went the same way as the others, sewed right sides together, clipped corners, turned and pressed, slip-stitched the opening. Then I had fun with embellishments, couching a silver gilt twist along the fancy edges and adding some antique metal spangles.
CONCLUSION
Now, if I were to make more and do so by hand, I would like to use a different method, wherein I turn in and press all my seam allowances and whip the lining down on the inside edges. I would also like to play with adding some sort of lightweight interlining, probably osnaburg, to the fronts of the bows just to see what it looks like. This is all hypothetical of course, until I can find some extents or further directions to satisfy my curiosity.
Regardless, this was a very fun little project, and I am very pleased with how all of these bows look and cannot wait to wear them!
Thanks for reading, feel free to let me know what you think!


Leave a comment